intent = new Intent(Intent.ACTION_PICK);

    intent.setType
(android.provider.MediaStore.Images.Media.CONTENT_TYPE);

'Android > Tip&Tech' 카테고리의 다른 글

canvas를 bitmap , png 저장  (0) 2011.05.16
view 를 bitmap으로 저장  (0) 2011.05.16
android 얼굴인식  (0) 2011.05.15
android camera crop example  (4) 2011.05.15
Bitmap 에 관한 팁  (0) 2011.05.15

안 드로이드에는 얼굴 인식 기능이 내장되어 있습니다. FaceDetector Class가 바로 이미지를 분석하여 얼굴을 찾아내는 역할을 하는 클래스입니다. 얼굴 인식 기능은 이미지를 사용하는 다양한 애플리케이션에서 활용 가능 하고 간단히 사용할 수 있으므로 참고하세요.

FaceDetector.Face[] faces = new FaceDetector.Face[10];     // 최대 인식할 얼굴수 설정
FaceDetector detector = new FaceDetector(bitmap.getWidth(), bitmap.getHeight(), faces.length);
int numFaces = detector.findFaces(bitmap, faces);     // 얼굴 인식 실행
for(FaceDetector.Face face : faces) {
    PointF midPoint = new PointF();
    face.getMidPoint(midPoint);            //눈과 눈사의 가운데 지점
    float eyesDistance = face.eyesDistance();    //눈과 눈사이의 거리
    //처리.
}

더 많은 샘플 소스는 아래의 사이트들을 참고하세요.
- http://d.hatena.ne.jp/bols-blue/20090818/1250562668
- http://blog.livedoor.jp/deeds_not_words/archives/624855.html
- http://www.anddev.org/quick_and_easy_facedetector_demo-t3856.html


펌 : http://www.androidpub.com/android_dev_info/22845

'Android > Tip&Tech' 카테고리의 다른 글

view 를 bitmap으로 저장  (0) 2011.05.16
기본 갤러리로 바로 접근 하는 코드  (0) 2011.05.16
android camera crop example  (4) 2011.05.15
Bitmap 에 관한 팁  (0) 2011.05.15
android 해상도 및 화면중앙 구하기  (0) 2011.05.13
출처 : http://theeye.pe.kr/entry/example-of-image-crop-with-camera-and-album-picker-on-android


안드로이드에서 카메라를 이용하여 이미지 촬영후 해당 이미지를 크롭하는 경우의 예제를 만들어 보았습니다. 이 예제에서는 카메라를 이용하는것 외에도 앨범에서 이미지를 가져오는 경우에도 마찬가지로 크롭을 할 수 있도록 하였습니다.

1. AndroidManifest.xml 에 권한 추가하기
<uses-permission 
  android:name="android.permission.CAMERA" /> 
<uses-permission 
  android:name="android.permission.WRITE_EXTERNAL_STORAGE" />

2. main.xml 레이아웃 만들기
<?xml version="1.0" encoding="utf-8"?> 
<LinearLayout 
    xmlns:android="http://schemas.android.com/apk/res/android" 
    android:orientation="vertical" 
    android:layout_width="fill_parent" 
    android:layout_height="fill_parent" 
    > 
        <Button 
                android:id="@+id/button" 
                android:layout_width="fill_parent" 
                android:layout_height="wrap_content" 
                android:text="이미지 가져오기" 
                /> 
        <ImageView 
                android:id="@+id/image" 
                android:layout_width="90dp" 
                android:layout_height="90dp" 
                android:layout_gravity="center" 
                android:layout_margin="50dp" 
                android:background="#eee" 
                /> 
</LinearLayout>

3. 소스 코드 작성
package pe.kr.theeye.cameracrop; 
 
import java.io.File; 
 
import android.app.Activity; 
import android.app.AlertDialog; 
import android.content.DialogInterface; 
import android.content.Intent; 
import android.graphics.Bitmap; 
import android.net.Uri; 
import android.os.Bundle; 
import android.os.Environment; 
import android.provider.MediaStore; 
import android.view.View; 
import android.view.View.OnClickListener; 
import android.widget.Button; 
import android.widget.ImageView; 
 
 
public class CameraCropActivity extends Activity implements OnClickListener 
{ 
  private static final int PICK_FROM_CAMERA = 0; 
  private static final int PICK_FROM_ALBUM = 1; 
  private static final int CROP_FROM_CAMERA = 2; 
 
  private Uri mImageCaptureUri; 
  private ImageView mPhotoImageView; 
  private Button mButton; 
 
  @Override 
  public void onCreate(Bundle savedInstanceState) 
  { 
    super.onCreate(savedInstanceState); 
    setContentView(R.layout.main); 
     
    mButton = (Button) findViewById(R.id.button); 
    mPhotoImageView = (ImageView) findViewById(R.id.image); 
     
    mButton.setOnClickListener(this); 
  } 
 
  /** 
   * 카메라에서 이미지 가져오기 
   */ 
  private void doTakePhotoAction() 
  { 
    /* 
     * 참고 해볼곳 
     * http://2009.hfoss.org/Tutorial:Camera_and_Gallery_Demo 
     * http://stackoverflow.com/questions/1050297/how-to-get-the-url-of-the-captured-image 
     * http://www.damonkohler.com/2009/02/android-recipes.html 
     * http://www.firstclown.us/tag/android/ 
     */ 
 
    Intent intent = new Intent(MediaStore.ACTION_IMAGE_CAPTURE); 
     
    // 임시로 사용할 파일의 경로를 생성 
    String url = "tmp_" + String.valueOf(System.currentTimeMillis()) + ".jpg"; 
    mImageCaptureUri = Uri.fromFile(new File(Environment.getExternalStorageDirectory(), url)); 
     
    intent.putExtra(android.provider.MediaStore.EXTRA_OUTPUT, mImageCaptureUri); 
    // 특정기기에서 사진을 저장못하는 문제가 있어 다음을 주석처리 합니다. 
    //intent.putExtra("return-data", true); 
    startActivityForResult(intent, PICK_FROM_CAMERA); 
  } 
   
  /** 
   * 앨범에서 이미지 가져오기 
   */ 
  private void doTakeAlbumAction() 
  { 
    // 앨범 호출 
    Intent intent = new Intent(Intent.ACTION_PICK); 
    intent.setType(android.provider.MediaStore.Images.Media.CONTENT_TYPE); 
    startActivityForResult(intent, PICK_FROM_ALBUM); 
  } 
 
  @Override 
  protected void onActivityResult(int requestCode, int resultCode, Intent data) 
  { 
    if(resultCode != RESULT_OK) 
    { 
      return; 
    } 
 
    switch(requestCode) 
    { 
      case CROP_FROM_CAMERA: 
      { 
        // 크롭이 된 이후의 이미지를 넘겨 받습니다. 
        // 이미지뷰에 이미지를 보여준다거나 부가적인 작업 이후에 
        // 임시 파일을 삭제합니다. 
        final Bundle extras = data.getExtras(); 
   
        if(extras != null) 
        { 
          Bitmap photo = extras.getParcelable("data"); 
          mPhotoImageView.setImageBitmap(photo); 
        } 
   
        // 임시 파일 삭제 
        File f = new File(mImageCaptureUri.getPath()); 
        if(f.exists()) 
        { 
          f.delete(); 
        } 
   
        break; 
      } 
   
      case PICK_FROM_ALBUM: 
      { 
        // 이후의 처리가 카메라와 같으므로 일단  break없이 진행합니다. 
        // 실제 코드에서는 좀더 합리적인 방법을 선택하시기 바랍니다. 
         
        mImageCaptureUri = data.getData(); 
      } 
       
      case PICK_FROM_CAMERA: 
      { 
        // 이미지를 가져온 이후의 리사이즈할 이미지 크기를 결정합니다. 
        // 이후에 이미지 크롭 어플리케이션을 호출하게 됩니다. 
   
        Intent intent = new Intent("com.android.camera.action.CROP"); 
        intent.setDataAndType(mImageCaptureUri, "image/*"); 
   
        intent.putExtra("outputX", 90); 
        intent.putExtra("outputY", 90); 
        intent.putExtra("aspectX", 1); 
        intent.putExtra("aspectY", 1); 
        intent.putExtra("scale", true); 
        intent.putExtra("return-data", true); 
        startActivityForResult(intent, CROP_FROM_CAMERA); 
   
        break; 
      } 
    } 
  } 
 
  @Override 
  public void onClick(View v) 
  { 
    DialogInterface.OnClickListener cameraListener = new DialogInterface.OnClickListener() 
    { 
      @Override 
      public void onClick(DialogInterface dialog, int which) 
      { 
        doTakePhotoAction(); 
      } 
    }; 
     
    DialogInterface.OnClickListener albumListener = new DialogInterface.OnClickListener() 
    { 
      @Override 
      public void onClick(DialogInterface dialog, int which) 
      { 
        doTakeAlbumAction(); 
      } 
    }; 
     
    DialogInterface.OnClickListener cancelListener = new DialogInterface.OnClickListener() 
    { 
      @Override 
      public void onClick(DialogInterface dialog, int which) 
      { 
        dialog.dismiss(); 
      } 
    }; 
     
    new AlertDialog.Builder(this) 
      .setTitle("업로드할 이미지 선택") 
      .setPositiveButton("사진촬영", cameraListener) 
      .setNeutralButton("앨범선택", albumListener) 
      .setNegativeButton("취소", cancelListener) 
      .show(); 
  }}

테스트 이미지는 생략하겠습니다. 위의 소스로 충분히 좋은 설명이 될 수 있을것이라 생각합니다. 두번의 Intent 호출을 통해 이미지를 촬영하고 크롭을 하는 과정을 거치게 됩니다. 테스트 해보니 잘 되는군요. 프로젝트 소스코드를 첨부합니다.


참고 : http://stackoverflow.com/questions/1973359/android-crop-an-image-after-taking-it-with-camera-with-a-fixed-aspect-ratio

'Android > Tip&Tech' 카테고리의 다른 글

기본 갤러리로 바로 접근 하는 코드  (0) 2011.05.16
android 얼굴인식  (0) 2011.05.15
Bitmap 에 관한 팁  (0) 2011.05.15
android 해상도 및 화면중앙 구하기  (0) 2011.05.13
[펌]Android]Convert Drawable to Bitmap  (0) 2011.05.12
Android에서 Bitmap 관련 작업을 할때 항상 사용하는것이 Bitmap 클래스와 BitmapFactory 클래스이다.

BitmapFactory 클래스는 decode 메서드를 사용하여 File, Stream 등을 입력받아 Bitmap으로 변환할 수 있다.
Bitmap 클래스는 Bitmap의 재가공, Bitmap의 구성을 변경한다던지, 크기를 변경하는 작업을 수행한다.

그런데 현재 Android 상에서 위 2개는 심각한 메모리 누수를 유발하고 있다.

단순 SD 카드에서 파일을 읽어 와 표시해주는 것이라면 관계가 없지만 

작업 1. MediaStore를 사용하여 이미지를 가지고 온 후 크기를 변경하고 이를 화면에 표시함과 동시에 서버에 업로드 한다.

위 작업이 한번이 아닌 여러번 수행 되어야 한다면..? 3번? 많게는 5번 이내로 오류나서 어플이 종료가 된다.;;

오류를 발생한 작업 

1
2
3
4
5
6
7
8
9
10
11
12
13
14
15
16
17
18
19
20
21
22
23
24
25
26
27
28
29
30
31
32
33
34
35
36
37
38
39
40
41
42
43
44
45
46
47
48
49
50
51
52
53
54
55
56
57
Bitmap resized = null;
Bitmap orgBitmap = null;
File targetFile = null;
int[] size = null;
 
// 이미지 품질 옵션
options.inTempStorage = new byte[16*1024];
options.inSampleSize = 1;
 
switch(requestCode){
    case CommonResource.SHOW_ALBUM:
        photoUri = data.getData();
          
        // 갤러리에서 선택했을때 실제 경로 가져오기 위해 커서
        String [] proj={MediaStore.Images.Media.DATA};  
        Cursor cursor = managedQuery( photoUri,  
                proj, // Which columns to return  
                null,       // WHERE clause; which rows to return (all rows)  
                null,       // WHERE clause selection arguments (none)  
                null); // Order-by clause (ascending by name)  
        int column_index = cursor.getColumnIndexOrThrow(MediaStore.Images.Media.DATA);  
        cursor.moveToFirst();  
        
        photoUri = Uri.parse(cursor.getString(column_index));
        // 비트맵을 먼저 만들고
        orgBitmap = BitmapFactory.decodeFile(photoUri.getPath(), options);
        // 원본 사이즈에 따른 새로운 사이즈 계산
        size = commonUtil.getBitmapSize(orgBitmap);
        // 비트맵 생성
        displayBitmap = Bitmap.createScaledBitmap(orgBitmap, size[0], size[1], true);
          
        // 디바이스에 맞게 비트맵 생성 후 업로드 하여야 하므로 임시 파일을 생성해준다.
        // MediaStore에는 원본이, 아래는 복사본을 생성하여 업로드 하는 것.
        try {
            File targetFolder = new File(targetPath);
            if(!targetFolder.exists()){
                targetFolder.mkdirs();
                targetFolder.createNewFile();
            }
            if(targetFile == null)
                targetFile = new File(targetFolder, UUID.randomUUID().toString());
              
            FileOutputStream out = new FileOutputStream(targetFile);
            displayBitmap.compress(Bitmap.CompressFormat.JPEG, 100, out); 
            out.flush();
            out.close();
              
            uploadImagePath = targetFile.getAbsolutePath();
              
        } catch (Exception e) { 
               e.printStackTrace(); 
        } finally{
            targetFile = null;
            uploadImage.setImageBitmap(commonUtil.getRoundedCornerBitmap(this, displayBitmap, 10));
        }
        break;
    }

위 소스에서 orgBitmap에 앨범에서 사진을 하나 불러온다. 이 사진은 사이즈가 허벌나다. (orgBitmap)
그리고 이 사진을 그대로 업로드 할 시 트래픽도 크고 시간도 오래 걸릴게 뻔하다 생각하여 
비율에 맞게 다시 크기를 조정하여 비트맵을 생성하게 했다. (displayBitmap)
그리고 업로드를 위한 임시파일을 생성하도록 코드가 이어지고
마지막으로 화면에 표시할때는 round 처리까지 한 후 보여지게 되어 있다.

그지같게도 비트맵을 생성한 후 메모리가 반환이 되지 않는다. 
절대... 쓸일 없는 Bitmap은 recycle()하면 된다지만 역시 일부다.

위 작업을 두번하니까 어플이 그냥 죽는다. 카메라로 촬영을 하든 앨범에서 가지고 오든 죽는다.

원인은 비트맵의 반복 생성. 
createScale을 사용하던 decode를 하던 한번 만드는 것도 메모리를 상당부분 사용하는데 이를 중복으로 사용하는게 문제라는 것.

그래서 아래와 같이 코드를 바꾸기로 했다.

1
2
3
4
5
6
7
8
9
10
11
12
13
14
15
16
17
18
19
20
21
22
23
24
25
26
27
28
// 이미지 품질 옵션
options.inJustDecodeBounds = true;
  
switch(requestCode){
    case CommonResource.SHOW_ALBUM:
        photoUri = data.getData();
              
        // 갤러리에서 선택했을때 실제 경로 가져오기 위해 커서
        String [] proj={MediaStore.Images.Media.DATA};  
        Cursor cursor = managedQuery( photoUri,  
                proj, // Which columns to return  
                null,       // WHERE clause; which rows to return (all rows)  
                null,       // WHERE clause selection arguments (none)  
                null); // Order-by clause (ascending by name)  
        int column_index = cursor.getColumnIndexOrThrow(MediaStore.Images.Media.DATA);  
        cursor.moveToFirst();  
        
        photoUri = Uri.parse(cursor.getString(column_index));
        uploadImagePath = photoUri.getEncodedPath();
        displayBitmap = BitmapFactory.decodeFile(uploadImagePath, options);
          
        options = commonUtil.getBitmapSize(options);
        displayBitmap = BitmapFactory.decodeFile(uploadImagePath, options);
          
        uploadImage.setImageBitmap(displayBitmap);
          
        break;
}

1
2
3
4
5
6
7
8
9
10
11
12
13
14
15
16
17
18
19
20
21
22
23
24
25
    public Options getBitmapSize(Options options){
        int targetWidth = 0;
        int targetHeight = 0;
          
        if(options.outWidth > options.outHeight){    
            targetWidth = (int)(600 * 1.3);
            targetHeight = 600;
        }else{
            targetWidth = 600;
            targetHeight = (int)(600 * 1.3);
        }
  
        Boolean scaleByHeight = Math.abs(options.outHeight - targetHeight) >= Math.abs(options.outWidth - targetWidth);
        if(options.outHeight * options.outWidth * 2 >= 16384){
            double sampleSize = scaleByHeight
                ? options.outHeight / targetHeight
                : options.outWidth / targetWidth;
            options.inSampleSize = (int) Math.pow(2d, Math.floor(Math.log(sampleSize)/Math.log(2d)));
        }
        options.inJustDecodeBounds = false;
        options.inTempStorage = new byte[16*1024];
          
        return options;
    }
Bitmap으로 생성하진 않고 먼저 decoding만 한 후 크기를 가져와 실제 맞추려는 크기와 비교하여 size 조절이 필요하면
사이즈를 조절하도록 option을 설정하면 된다.
구글링 하다 보니 누가 만들어 놓았더라. (출처는 소스에..)

아.. 맘 놓고 해결

'Android > Tip&Tech' 카테고리의 다른 글

android 얼굴인식  (0) 2011.05.15
android camera crop example  (4) 2011.05.15
android 해상도 및 화면중앙 구하기  (0) 2011.05.13
[펌]Android]Convert Drawable to Bitmap  (0) 2011.05.12
canvas 내용 파일저장하기  (2) 2011.05.11
해상도 별로 레이아웃 설정을 변경하거나 또는 늘이거나 줄이지 않고, 중앙에 표시하고자 할 때는 아래와 같이 합니다.  현재 진행 중인 게임 강좌에 맞춰서 예제를 만들어 봤습니다.
01.package app.main;
02. 
03.import ryulib.game.GamePlatform;
04.import android.app.Activity;
05.import android.os.Bundle;
06.import android.util.DisplayMetrics;
07.import android.widget.LinearLayout;
08. 
09.public class Main extends Activity {
10. 
11.private static final int _Width = 300;
12.private static final int _Height = 400;
13. 
14./** Called when the activity is first created. */
15.@Override
16.public void onCreate(Bundle savedInstanceState) {
17.super.onCreate(savedInstanceState);
18. 
19.DisplayMetrics displayMetrics = new DisplayMetrics();
20.getWindowManager().getDefaultDisplay().getMetrics(displayMetrics);
21.int deviceWidth  = displayMetrics.widthPixels;
22.int deviceHeight = displayMetrics.heightPixels;
23. 
24.LinearLayout layout = new LinearLayout(this);
25.layout.setPadding(
26.(deviceWidth  - _Width)  / 2,
27.(deviceHeight - _Height) / 2,
28.(deviceWidth  - _Width)  / 2,
29.(deviceHeight - _Height) / 2
30.);
31.setContentView(layout);       
32. 
33._GamePlatform = new GamePlatform(this);
34.layout.addView(_GamePlatform);
35. 
36._GamePlatform.AddControl(_Box);
37.}
38. 
39.private GamePlatform _GamePlatform = null;
40.private Box _Box = new Box(null);  
41.}

'Android > Tip&Tech' 카테고리의 다른 글

android camera crop example  (4) 2011.05.15
Bitmap 에 관한 팁  (0) 2011.05.15
[펌]Android]Convert Drawable to Bitmap  (0) 2011.05.12
canvas 내용 파일저장하기  (2) 2011.05.11
image를 canvas이용해서 그리기  (0) 2011.05.11
출처 : http://psjin14.tistory.com/99

컴퓨터/Android

Android]Convert Drawable to Bitmap

2010/07/09 23:05 | Posted by 예섬수진
아래는 Drawable 객체를 Bitmap 객체로 변환하는 방법이다. 
Drawable d; // 특정 값 대입
Bitmap bitmap = Bitmap.createBitmap(width, height, Bitmap.Config.ARGV_8888);
Canvas canvas = new Canvas(bitmap);
d.setBounds(0, 0, width, height);
d.draw(canvas);

그럼 이 소스를 이용하여 작성된 코드를 살펴 보자. 
 소스 코드
 
     => 이 코드에는 ImageView 2개가 있다. 
       1) original_iv는 Drawble\icon.png를 이미지로 설정하였다. [setImageResource( ) 활용]
       2) copy_iv에서는 original_iv의 Drawable 값을 Bitmap 객체로 변화하여, 이를 이미지로 설정하였다. 
          [setImageBitmap( ) 활용]

실행 화면을 살펴 보면, 아래와 같다. 
상단의 이미지가 원본, 하단의 이미지가 Bitmap으로 변환된 것을 표시한 것이다. 
 실행된 화면 
1.  상단의 그림은 Drawable\icon.png를 직접 설정해서 표시한 것. 
2. 하단의 그림은 상단 이미지의 Drawble 값을 Bitmap 객체로 변환하여 표시한 것

몇개월 전에 짠 내 소스에서 뽑아서 적음..;;;;;;;;;


private void saveView( View view ) 

    { 

       String path = 

       Environment.getExternalStorageDirectory().getAbsolutePath();


       Bitmap  b = Bitmap.createBitmap( 

       view.getWidth(), view.getHeight(), Bitmap.Config.RGB_565);

       if(b!=null){

       try

      File f = new File(path+"/notes");

      f.mkdir();

      File f2 = new File(path + "/notes/"+title+".png");


      Canvas c = new Canvas( b ); 

      view.draw( c ); 

      FileOutputStream fos = new FileOutputStream(f2);


                if ( fos != null

                { 

                        b.compress(Bitmap.CompressFormat.PNG, 100, fos ); 

                        fos.close(); 

                } 

                //setWallpaper( b ); 


      } catch( Exception e ){ 

                Log.e("testSaveView", "Exception: " + e.toString() ); 

      } 

       }

    }  
import android.app.Activity;
import android.content.Context;
import android.content.res.Resources;
import android.graphics.Bitmap;
import android.graphics.BitmapFactory;
import android.graphics.Canvas;
import android.graphics.Color;
import android.graphics.Rect;
import android.os.Bundle;
import android.view.View;
import android.view.Window;

public class CanvasView extends Activity {
    /** Called when the activity is first created. */
    @Override
    public void onCreate(Bundle savedInstanceState) {
        super.onCreate(savedInstanceState);
        requestWindowFeature(Window.FEATURE_NO_TITLE);
        setContentView(new ImageView(this));
    }
    
    public class ImageView extends View{
    	
    	private Bitmap image; // 이미지
    	
    	public ImageView(Context context) {
			super(context);
			setBackgroundColor(Color.WHITE);
			// 그림 읽어들이기 
			Resources r = context.getResources();
			image = BitmapFactory.decodeResource(r, R.drawable.excavator);
    	}

		@Override
		protected void onDraw(Canvas canvas) {
			// 원본이미지
			canvas.drawBitmap(image, 0, 0, null);
			
			// 원본이미지 영역을 축소해서 그리기 
			int w = image.getWidth();
			int h = image.getHeight();
			Rect src = new Rect(0, 0, w, h);
			Rect dst = new Rect(0, 200, w / 2, 200 + h / 2);
			canvas.drawBitmap(image, src, dst, null);
			super.onDraw(canvas);
		}
    }
}

출처 : http://micropilot.tistory.com/1588

Android 에서 Gallery 위젯을 사용하는 예제
Gallery 상에서 중앙에 위치하는 이미지의 위치를 확인하여 Gallery 하단에 표시하는 기능을 추가해 보았다.

사용자 삽입 이미지


사용된 이미지들
 images.zip


res/values/attrs.xml

<?xml version="1.0" encoding="utf-8"?> 

<resources>  
 <declare-styleable name="GalleryTheme">  
  <attr name="android:galleryItemBackground" /> 
 </declare-styleable>
</resources>


res/layout/main.xml

<?xml version="1.0" encoding="utf-8"?>
<LinearLayout xmlns:android="http://schemas.android.com/apk/res/android"
    android:orientation="vertical"
    android:layout_width="fill_parent"
    android:layout_height="fill_parent" 
    android:background="#ffffff">
    
 <TextView  
     android:layout_width="fill_parent" 
     android:layout_height="wrap_content" 
     android:text="@string/hello" />
     
 <Gallery
  android:id="@+id/gallery"    
  android:layout_width="fill_parent"    
  android:layout_height="wrap_content"/>
  
 <LinearLayout
  android:id="@+id/dotPanel"
  android:orientation="horizontal"
  android:layout_width="fill_parent"
  android:layout_height="wrap_content"
  android:layout_gravity="center">

 </LinearLayout>
  
</LinearLayout>


GalleryTestActivity.java

package com.dearpeople.android.test.gallery;

import android.app.Activity;
import android.content.Context;
import android.os.Bundle;
import android.util.Log;
import android.view.Gravity;
import android.view.View;
import android.widget.AdapterView;
import android.widget.Gallery;
import android.widget.ImageView;
import android.widget.LinearLayout;
import android.widget.TableLayout.LayoutParams;

public class GalleryTestActivity extends Activity {
    /** Called when the activity is first created. */
 
 ImageView [] imageView;
 
    @Override
    public void onCreate(Bundle savedInstanceState) {    
     super.onCreate(savedInstanceState);    
     setContentView(R.layout.main);
     
     Gallery g = (Gallery) findViewById(R.id.gallery);    
     g.setAdapter(new ImageAdapter(this));    
     
     g.setOnItemClickListener(new AdapterView.OnItemClickListener() {        
      public void onItemClick(AdapterView parent, View v, int position, long id) {            
       //클릭된 경우에 실행됨
       //Fling시에는 실행안됨

      }    
     });
     /* Gallery 중앙의 아이템(선택된 아이템)이 변경되면 실행됨 */
     g.setOnItemSelectedListener(new AdapterView.OnItemSelectedListener() {

   @Override
   public void onItemSelected(AdapterView<?> arg0, View arg1, int arg2, long arg3) {
    /* 첫번째 아이템이 선택된 경우 arg2의 값은 0 이다 */
    //Log.i("Gallery Event", "Gallery Current Viewing Item "+arg2);

    selectDot(arg2);
   }

   @Override
   public void onNothingSelected(AdapterView<?> arg0) {
   }
  });
     LinearLayout layout = (LinearLayout)findViewById(R.id.dotPanel);
     /* Gallery하단의 위치를 표시하는 작은 원의 갯수를 지정하여 그린다 */
     createDotPanel(this,layout,10);
    }
    
    private void createDotPanel(Context context, LinearLayout layout, int count){
     imageView = new ImageView[count];
     for(int i=0;i<count;i++){
      imageView[i] = new ImageView(context);
      LinearLayout.LayoutParams params = new LinearLayout.LayoutParams(0, 0);
      params.width = LayoutParams.WRAP_CONTENT;
      params.height = LayoutParams.WRAP_CONTENT;
      params.leftMargin= 25;
      params.gravity = Gravity.CENTER;
      imageView[i].setLayoutParams(params);
      imageView[i].setImageResource(R.drawable.gray_circle);
      layout.addView(imageView[i]);
     }
    }
    
    private void selectDot(int position){
     for(int i=0;i<imageView.length;i++){
      if(i==position) imageView[i].setImageResource(R.drawable.black_circle);
      else imageView[i].setImageResource(R.drawable.gray_circle);
     }
    }
}


ImageAdapter.java

package com.dearpeople.android.test.gallery;

import android.content.*;
import android.content.res.*;
import android.view.*;
import android.widget.*;

public class ImageAdapter extends BaseAdapter {    
 int mGalleryItemBackground;    
 private Context mContext;    
 private Integer[] mImageIds = {            
   R.drawable.images01,            
   R.drawable.images02,            
   R.drawable.images03,            
   R.drawable.images04,            
   R.drawable.images05,            
   R.drawable.images06,            
   R.drawable.images07,
   R.drawable.images08,
   R.drawable.images09,
   R.drawable.images10
   };    
 public ImageAdapter(Context c) {        
  mContext = c;        
  TypedArray a = c.obtainStyledAttributes(R.styleable.GalleryTheme);        
  mGalleryItemBackground = a.getResourceId(R.styleable.GalleryTheme_android_galleryItemBackground, 0);       
  a.recycle();    
 }    
 public int getCount() {        
   return mImageIds.length;    
 }    
 public Object getItem(int position) {        
  return position;    
 }    
 public long getItemId(int position) {        
  return position;    
 }    
 public View getView(int position, View convertView, ViewGroup parent) {        
  ImageView i = new ImageView(mContext);        
  i.setImageResource(mImageIds[position]);        
  i.setLayoutParams(new Gallery.LayoutParams(250, 200));        
  i.setScaleType(ImageView.ScaleType.FIT_XY);        
  i.setBackgroundResource(mGalleryItemBackground );        
  return i;    
 }
}


 FROM : http://cafe.naver.com/sunschool.cafe?iframe_url=/ArticleRead.nhn%3Farticleid=4394&

일반적으로 터치 이벤트는 down-move-up 단계를 거치면서 사용자의 동작을 감지할 수 잇다. 이런 사용자의 조합된 모션(제스쳐)를 쉽게 판별할 수 있도록 안드로이드는 GestureDetector 인터페이스를 제공하고 있다.


GestureDetector는 두가지의 Listener를 가지고 있다.


interface GestureDetector.OnDoubleTapListener    // 두번 터치 했을때

interface GestureDetector.OnGestureListener        // 일반적인 제스쳐


위의 두가지를 다가지고 있는 클래스가 GestureDetector.SimpleOnGestureListener 이다.

이클래스를 상속받으면 모든 Gesture를 다 사용할 수 있다.

사용방법:

     GestureDetector gd=new GestureDetector(this,new SimpleGestureListener());

     gd.onTouchEvent(event);   // 감시할 MotionEvent를 아규먼트로 설정하여 GestureDetector를 설정한다.


각 제스쳐 이벤트를 처리하는 메서드들


case1:   아주 살짝 터치하게 되면

             onDown

             onSingleTapUp        <- 30~60ms 후에 손이 떨어지면 발생
             onSingleTabConfirmed    <- onDown 이벤트 발생후 300ms 안에 onDown 이벤트가 다시 발생하지 않을때 발생
 

case2:   살짝 터치하게 되면

             onDown

             onShowPress          <- case1보다 조금 길게, 90-100ms 정도 터치되면 발생

             onSingleTapUp        <-  172ms 이후에 손을 떼면 발생
             onSingleTabConfirmed    <- onDown 이벤트 발생후 300ms 안에 onDown 이벤트가 다시 발생하지 않을때 발생
 

case3:   약간 길게 터치 되면

             onDown

             onShowPress          <- 100ms 정도 터치되면 발생

             onSingleTapUp        <-  300ms 이후 손을 떼게 되면 onSingleTabConfirmed는 발생하지 않는다.           
 

case4:  아주 길게 터치 되면

             onDown

             onShowPress          <- 100ms 정도 터치되면 발생           

             onLongPress           <- 590~600ms 정도에 발생. 이때 onSingleTabUp은 발생하지 않는다.


case4:  두번 터치 하게 되면

             onDown

             onSingleTabUp

             onDoubleTab     <- onSingleTabConfirmed가 발생하기 전에 다시 onDown 이벤트가 들어오게 되면 발생

             onDown        <- onDoubleTab 이벤트보다 빨리 들어올 수 도 있지만 일반적으로 늦게 들어온다.


case5:  두번 터치하게 되면
             onDown
             onSingleTapUp
             onDoubleTapEvent     <- onSingleTapConfirmed가 발생하기전에 다시 onDown 이벤트가 들어오게 되면 발생
             onDown                    <- 이건 onDoubleTap보다 먼저 들어올수도 늦게 들어올 수 도 있다.

             onDoubleTapEvent     <- 첫번째 DoubleTapEvent는 ACTION_DOWN, 이것은 ACTION_UP

             onDoubleTap과 onDoubleTapEvent와의 차이는 DOWN,NOVE,UP 이벤트까지 모두 캐치된다는 점이다.


case6:  스크롤

             onDown

             onScroll   <- 최소 30ms 이후부터 onScroll 이벤트가 발생할 수 있으며, 플링시키지 않고 살며시 손을 떼면
                                끝까지 onScroll 이벤트가 연속으로 발생한다.
 
case7: 플링

             onDown

             onScroll  
             onFling   <- 스크롤과 비슷하지만 마지막에 손가락을 약간 튕기게 되면 플링으로 인식된다.


 [사용코드예제]


package kim.android.test;

import android.app.Activity;
import android.graphics.Color;
import android.os.Bundle;
import android.util.Log;
import android.view.GestureDetector;
import android.view.MotionEvent;
import android.view.GestureDetector.OnGestureListener;
import android.widget.TextView;
import android.widget.Toast;


public class GestureTestActivity extends Activity implements OnGestureListener {


  private GestureDetector gd;
 
 
  @Override
  protected void onCreate(Bundle savedInstanceState) {
     // TODO Auto-generated method stub
     super.onCreate(savedInstanceState);
     gd = new GestureDetector(this);
     TextView text=new TextView(this);
     text.setText("제스쳐테스트");
     text.setTextColor(Color.GREEN);
     text.setTextSize(20);
     setContentView(text);
   }
 
 
   // Activity의 onTouchEvent가 발생되면 이것을 GestureDetector의 onTouchEvent로
   // 등록해줌으로써 액티비티의 이벤트를 제스쳐로 처리되도록 한다.
   @Override
   public boolean onTouchEvent(MotionEvent event) {
       // TODO Auto-generated method stub
       return gd.onTouchEvent(event);
   }


   // 터치하려고 손을 대기만 해도 발생되는 이벤트, 모든 제스쳐의 시작
   @Override
   public boolean onDown(MotionEvent arg0) {
      // TODO Auto-generated method stub
      Toast.makeText(this, "onDown 이벤트 발생", Toast.LENGTH_SHORT).show();
      Log.i("GestureTestActivity", "onDown called");
      return true;
   }


    // 드래그하다 띄면 호출됨.
    // onScroll 이벤트와 비슷하지만 끝에 살짝 튕기는 동작에서 발생되는 이벤트
   @Override
   public boolean onFling(MotionEvent e1, MotionEvent e2, float velocityX, float velocityY) {
          // TODO Auto-generated method stub
          Toast.makeText(this, "onFling 이벤트 발생", Toast.LENGTH_SHORT).show();
          return true;
    }


   // 길게 누르면 호출됨(약 590~600ms 정도 누를때 호출됨)
   @Override
   public void onLongPress(MotionEvent e) {
         // TODO Auto-generated method stub
         Toast.makeText(this, "onFling 이벤트 발생", Toast.LENGTH_SHORT).show();

    }
 
    // 터치하면 호출됨. 100ms 정도 누를때 호출됨
    @Override
     public void onShowPress(MotionEvent e) {
           // TODO Auto-generated method stub
          Toast.makeText(this, "onShowPress 이벤트 발생", Toast.LENGTH_SHORT).show();

     }
 
     // 드래그시 호출. 최소 30ms 이후부터는 onScroll 이벤트가 발생할 수 있으며,
     // 플링시키지 않고 살며시 손을 떼면 끝까지 onScroll 이벤트만 연속으로 발생
    @Override
     public boolean onScroll(MotionEvent e1, MotionEvent e2, float distanceX,float distanceY) {
           // TODO Auto-generated method stub
           Toast.makeText(this, "onScroll 이벤트 발생", Toast.LENGTH_SHORT).show();
           return true;
     }


     // 한번 터치하고 다음에 다시 터치 이벤트가 들어오지 않았을때,
     // 한번 터치가 확실하다고 확인 시켜주는 이벤트
     @Override
     public boolean onSingleTapUp(MotionEvent e) {
           // TODO Auto-generated method stub
          Toast.makeText(this, "onSingleTapUp 이벤트 발생", Toast.LENGTH_SHORT).show();
          return true;
     }

}


출처 : http://louise.tistory.com/71


참조 : 갤럭시S 중복 저장 문제  http://www.androidpub.com/733994


         갤러리에 저장해서 불러오기:  http://moss.tistory.com/7


*. 사진 찍기

0. request code 정의

private final static int ACT_TAKE_PIC = 1;


 1. 원하는 지점에서 intent 호출


 Intent cameraIntent = new Intent(MediaStore.ACTION_IMAGE_CAPTURE);

 startActivityForResult(cameraIntent,ACT_TAKE_PIC);


2. 결과 받기.


 protected void onActivityResult(int requestCode, int resultCode, Intent data) {

     super.onActivityResult(requestCode, resultCode, data);

     switch(requestCode) {

      case ACT_TAKE_PIC:

       if (resultCode == RESULT_OK)

       {

        try{

             (Bitmap)data.getExtras().get("data"); //섬네일

            } catch(Exception e){ 

            }

       }

       break;

     }

    }


3. 섬네일 이외의 풀사이즈를 받기 위해서는

  MediaStore.EXTRA_OUTPUT으로 uri를 지정해주어야 한다.

 intent 호출시 아래 추가.


File file = new File(Environment.getExternalStorageDirectory().getAbsolutePath()+"/my/", "pic.jpg");

cameraIntent.putExtra(MediaStore.EXTRA_OUTPUT, Uri.fromFile(file));


결과 처리시 Access

 ** 이때 메모리 부족으로 호출한 Activity가 dealloc될수 있음을 상기하자 또한 이때 onActivityResult() Intent data값이 null이 들어 올수도 있다.

(Bitmap)data.getExtras().get(MediaStore.EXTRA_OUTPUT);


* Bitmap Uri에서 불러오기

File file = new File(Environment.getExternalStorageDirectory().getAbsolutePath()+"/my/", "pic.jpg");


Bitmap bm = Media.getBitmap(getContentResolver(), Uri.fromFile(file));


* Image View에 Bitmap 설정


Bitmap bm = (Bitmap) data.getExtras().get("data");

imgPic.setImageBitmap(bm);

imgPic.setScaleType(ImageView.ScaleType.FIT_XY);

오늘은 푸시서버를 구현해보도록 할께요

카카오톡이나 많은 SNS서비스를 제공하는 앱들이 해당 기능을 활용하여 통신을 하고 있죠?


간단할 것 같지만, 막상 해보면 어디서 시작해서 어떤 방식으로 구현을 해야하는지 막막할 수 있어요

저 또한 그랬고 그래서 많은 서핑들을 하게 되는데, 


항상 뭔가 아쉽더라구요.

너무 쉬워서 생략해놓은 곳도 있고 기본이라고 생각하고 그냥 언급하지 않은 내용들 때문에

하나 성공하고 나면 결국 다른걸로 막혀서 또 검색하고,,,  그걸 반복하면. 반나절이 지나가더라구요


저 처럼 헤매실 분들을 위하여 정리해보아요~


"렘군와 함께하는 푸시서버 만들기"


자~ 한 시간만 따라하면 아이폰으로 "Hello World" 메세지가 뜰 수 있어요~

대신 엄청 집중하셔야 되요~


깔끔하게 Action위주로 정리해서 알려드릴께요

(참고로 APNS는 시뮬레이터에서는 테스트 불가능,개발자라이센스 보유하여야 아이폰장비에서 테스트가능)


  가정1 : Provisioning Portal 에서 Certificates, Devices  등록되어 있다는 가정

            만약 안되어 있다면 ->  http://artyst.egloos.com/2650529 참고 (보노님 블로그)


  <가정1 요약>

   1. App IDs 등록

   일단, APNS 테스트를 위해서 App등록부터 해야되요. 아직 프로젝트 진행은 아니고 테스트단계니까

   일단 편하게 이름짓자구요. 저는 APNS로 일단 등록했어요

   어디서 하는지 알죠?

   developer.apple.com 사이트 > member center > provision Portal 접속 > App IDs


   2. Provisioning 생성

   프로비저닝 명 정해주고, 인증서 선택하고, 1번에서 만든 App ID 선택하고 Devices 선택해주면되죠


  가정2 : APNS SSL Certificate 발급 받고 xCode 프로젝트속성에 설정 잡았다는 가정

          만약 안되어 있다면 -> http://artyst.egloos.com/2652130 참고 (보노님 블로그)


  <가정2 요약>

   1. 푸시 가능 SSL Certificate 를 받아야되요 <- 이게 제일 중요~!! 어플 여러개 개발해봤지만, 여기 숨어있으리라곤 생각못했어요

      App IDs 로 가셔서 APNS 앱 오른쪽에  Configure 클릭 > Enable for Apple Push Notification Service 선택 > Done 버튼 클릭

      -> 이때, 패스워드 설정하실 꺼에요 나중에 서버구현시 필요하니까. 꼭 적어놓으세요


   2. Download 해서 SSL Certificate 를 내려받기 (푸시기능이 되는 프로비져닝이죠)


   3. xCode 새 프로젝트 생성 > 프로젝트속성에서 code sign 프로비져닝 선택하기


   4. 운영서버 구현

       1) APNS 보안통신할 때 사용할 인증서 추출해서 웹서버 특정 폴더에 밑에 복사하기  <- 아주 중요

           (복사방법은 위에 보노님블로그에 기설명됨)

       2) 톰캣 서버 구성 (프로젝트 생성 및 코딩)


   5. 클라이언트 구현


1,2,3번까지는 대부분 순조롭게 진행되실꺼구요

4 번 5번은 좀더 구체적으로 들어가볼게요~


4. 운영서버 구현


<사전준비물>


1) 자바 jdk 1.6 설치 : http://www.oracle.com/technetwork/java/javase/downloads/index.html

2) 이클립스 설치 : http://eclipse.org/downloads/

3) 톰캣 설치 : http://tomcat.apache.org/ (6버전)

4) 이클립스 톰캣 플러그인 설치(option) : http://www.eclipsetotale.com/tomcatPlugin.html


이클립스 톰캣 설정 방법은 검색을 통해 진행하세요

http://blog.naver.com/ssari93/130086724100 (소토로님 블로그)

http://blog.naver.com/ssari93/130086768842 (소토로님 블로그)


<프로젝트 생성>


1) APNS 라는 이름으로 톰캣 프로젝트 생성하구요, 경로는 이클립스 workspace 밑에 둡니다.

  2) 톰캣 실행시 해당 경로를 홈으로 잡혀야겠죠?

      톰캣이 설치되어 있는 폴더 주소(기본)를 아래와 같이 따라가보시면 아무것도 없을 수 있는데요

      C:\Tomcat 6.0\conf\Catalina\localhost

      여기에 아래의 내용을 담아 프로젝트명.xml 파일을 만들어 주세요 (ex apns.xml) (톰캣프로젝트 생성하면 자동으로 생성되는 경우도 있음)

      <Context path="/apns" reloadable="true" docBase="E:\eclipse\workspace\apns"     

       workDir="E:\eclipse\workspace\apns\work" />

      이게 없으면 http://localhost:8080/apns/index.jsp 이렇게 호출 했을 때 해당 프로젝트를 정확히 인식할 수 없어요


  3) 톰캣 프로젝트 바로 아래에 index.jsp 파일 하나 생성해주시구요 Hello world 적고 출력해보세요

      http://localhost:8080/apns/index.jsp  (포트는 톰캣 server.xml 설정에 따라 달라 질 수 있어요)

      이게 제대로 나온다면 이제 코딩들어가죠


  4) 첨부파일 다운로드 받아서 압축을 풀면 lib 폴더가 나오는데, 해당 폴더 아래의 내용들을

     eclipse\workspace\apns\WEB-INF\lib 폴더에 copy 해주세요

     APNS서버 구성을 위해 필요한 라이브러리들입니다. (개별로 서핑해서 찾으실려면 고생하실까봐 첨부했어요)

        javapns
      log4j
      bcprov-ext
      commons-io
      commons-lang


<index.jsp 코딩>


<%@ page language="java" contentType="text/html; charset=EUC-KR"  pageEncoding="EUC-KR"%>
 
<%@ page import="javapns.back.PushNotificationManager" %>   
<%@ page import="javapns.back.SSLConnectionHelper" %>   
<%@ page import="javapns.data.Device" %>   
<%@ page import="javapns.data.PayLoad" %>   
<%@ page import="java.lang.Object" %>   
<%@ page import="org.apache.commons.lang.StringUtils" %>   


<!DOCTYPE html PUBLIC "-//W3C//DTD HTML 4.01 Transitional//EN" "http://www.w3.org/TR/html4/loose.dtd">
<html>
<head>
<meta http-equiv="Content-Type" content="text/html; charset=EUC-KR">
<title>Insert title here</title>
</head>
<body>

<%
 
System.out.println( "start~~!!!" );


String deviceToken = "4a525b59 273042ce ba95afae eb09db8f 2782ed06 cb5370b9 a57c02d1 fd6cf11d";   

//토큰 번호는 아이폰 클라이언트  구현 후 디버그 모드로 출력하면 알 수 있어요. 아래 5번 클라이언트구현 글 참고


PayLoad payLoad = new PayLoad();

payLoad.addAlert("hello kim, 반가워~!!");    // 아이폰에 통지 보낼 메세지 내용입니다.
payLoad.addBadge(1);
payLoad.addSound("default");                  
  
PushNotificationManager pushManager = PushNotificationManager.getInstance();


pushManager.addDevice("iPhone", deviceToken);
  
//Connect to APNs
String host = "gateway.sandbox.push.apple.com";
int port = 2195;
String certificatePath = "E:/eclipse/workspace/apns/ApnsCert.p12";     // 위에 가정2 4번에 설명한 부분이에요, 복사해놓은 경로명+파일명

String certificatePassword = "APNS인증서 패스워드";                                           // 위에 가정2 1번 부분에 설명한 패스워드에요

pushManager.initializeConnection(host, port, certificatePath, certificatePassword, SSLConnectionHelper.KEYSTORE_TYPE_PKCS12);

 
//Send Push
Device client = pushManager.getDevice("iPhone");

pushManager.sendNotification(client, payLoad);

pushManager.stopConnection();

pushManager.removeDevice("iPhone");


%>

please wait ...!


</body>
</html>


(빨간 색 부분만 변경하시면되요)


5. 클라이언트 구현


아이군님의 블로그에 설명이 너무나 잘 되어 있어서 링크 걸어요

http://theeye.pe.kr/entry/how-to-programming-push-notification-on-my-iphone-with-javapns


<내용 요약>

APNS 관련 함수들 몇가지면 수정해주시면되요

- (void)application:(UIApplication *)application  
    didRegisterForRemoteNotificationsWithDeviceToken:(NSData *)deviceToken


- (void)application:(UIApplication *)application 
    didReceiveRemoteNotification:(NSDictionary *)userInfo 


- (BOOL)application:(UIApplication *)application 
    didFinishLaunchingWithOptions:(NSDictionary *)launchOptions  


일단, 구현은 다 되었네요. 테스트를 해봐야 하는데요


<테스트방법>

1. 맥북에 아이폰 연결 후 실행모드(Device) 변경 해서 실행 (폰에 설치되고 실행됩니다. 화면에는 회색 화면만 뜨겠죠)

2. http://localhost:8080/apns/index.jsp  pc 브라우저에 해당 페이지 호출

3. 몇 초 후 아이폰에 푸시메시지 들어옴 확인

   어플이 실행중이지 않을 경우 닫기/보기 버튼 중 보기버튼을 누르면 해당 어플이 뜹니다.


메세지가 잘 들어왔나요?

한번만에 되신 분은 정말... 존경~!!


저는 톰캣 설정하는 것부터 오랫만에 해보는 거라 많이 헤맸거든요 ^^;

처음부터 다시 꼼꼼히 살펴보시면~~~  되실거에요


일단, 무작정 따라하기로 통보는 정상적으로 들어왔네요~!


이제 앞으로 몇가지 응용을 더 해봐야겠죠?


특정인에게만 통보 하기~

통보 받은 걸 화면에 대화창에 보여주기~

메신저 비스무리해보이는 어플 만들어보기~


완성되는 대로 포스팅할께요~~!!

긴글 읽어주셔서 감사합니다.

출처 : http://artyst.egloos.com/2652130

(2) 서버 소스코드


개발환경 : 자바(JAVA)

@ PHP 나 Objective C 는 다루는 곳이 많으므로 자바(JAVA) 로만 작성하도록 하겠다.


APNS 와 통신하려면 먼저 java에서 편리하게 이용할 수 있는 라이브러리를 다운로드 받자. http://code.google.com/p/javapns/ 에서 jar 파일을 다운로드 받을 수 있다.


그런데 이 API를 사용하기 위해서 필요한 라이브러리가 있다.


commons-lang-x.x.jar 가 없다면 org.apache.commons.lang.StringUtils 를 찾을 수 없다며 에러가 발생한다.

bcprov-ext-jdk16-xxx.jar 가 없다면 암호화관련 에러가 발생한다.


http://commons.apache.org/lang/ => apache

http://www.bouncycastle.org/ => 암호화 모듈


위의 사이트에서 각각 다운로드 받을 수 있다.


이제 서버에서 APNS로 메시지를 발송하는 JAVA 서버 프로바이저를 작성해보자.

deviceToken 에는 아이폰 클라이언트 어플에서 APNS 에 등록하고 나서 받은 토큰값을 넣어주자.

certificatePath 에는 인증서 경로와 파일명을 넣어주고, password에는 인증서를 추출할때 입력한 암호를 넣자.


import javapns.back.PushNotificationManager;

import javapns.back.SSLConnectionHelper;

import javapns.data.Device;

import javapns.data.PayLoad;


public class ApnsManager {

  public void provider() throws Exception {

    try {

      String deviceToken = "6a4aa1981062d0b8bxxbbaa3b6b0fdc275exyyx0f5dcac1ce101d314acca1a35";


      PayLoad payLoad = new PayLoad();

      payLoad.addAlert("알림 메시지 테스트");

      payLoad.addBadge(1);

      payLoad.addSound("default");

      PushNotificationManager pushManager = PushNotificationManager.getInstance();

      pushManager.addDevice("iPhone", deviceToken);

      //Connect to APNs

      String host = "gateway.sandbox.push.apple.com";

      int port = 2195;

      String certificatePath = "/work/project/apple-apns-key.p12";

      String certificatePassword = "인증서암호";

      pushManager.initializeConnection(host, port, certificatePath, certificatePassword, SSLConnectionHelper.KEYSTORE_TYPE_PKCS12);

      //Send Push

      Device client = pushManager.getDevice("iPhone");

      pushManager.sendNotification(client, payLoad);

      pushManager.stopConnection();


      pushManager.removeDevice("iPhone");

    }

    catch (Exception e) {

      e.printStackTrace(); 

    }

}


혹시 푸시알림을 제대로 받지 못했다면 아이폰의 설정을 살펴보자.


~ 끝 ~

기본적인 tab(상단)
http://blog.naver.com/lomi525?Redirect=Log&logNo=140113900088


tab 하단에 붙이기
http://mainia.tistory.com/554


tabWidget 높이 조절
http://neodreamer.tistory.com/420


tab - activitygroup, intent activity, 하단
http://rosaria1113.blog.me/110885107

[펌] Custom Android Button Style and Theme  안드로이드 / Programing...

2011/04/26 14:11

복사http://blog.naver.com/khch2489/30107398483

In this tutorial, we’ll see how it’s possible to create a custom button style for an Android application by using the Android styling API. First of all we need to define the new look for our custom button style. We would use three different NinePatch drawables.

A custom black nine patch drawable background for enabled, not pressed buttons :

black button background

A custom orange nine patch drawable background for enabled, pressed buttons :

Orange button background

A custom red nine patch drawable background for disabled buttons :

Red button background

All of these three custom drawable must be placed in the /res/drawables directory of our Android application. Now we must declare wich background should be used for each possible state of our custom button (pressed, disabled, focused, …). This is done by declaring a selector in a custom XML file :

<selector xmlns:android="http://schemas.android.com/apk/res/android">
    <item 
 android:state_enabled="false"
        android:drawable="@drawable/btn_red" />
    <item 
     android:state_pressed="true" 
     android:state_enabled="true"
        android:drawable="@drawable/btn_orange" />
    <item 
     android:state_focused="true" 
     android:state_enabled="true"
        android:drawable="@drawable/btn_orange" />
    <item 
     android:state_enabled="true"
        android:drawable="@drawable/btn_black" />
</selector>

Each item in the selector associates a drawable to a button state. Items must be declared in a specific order. The android selector draws the first selector item that match the current button state, no matter if another matching item is defined in the selector declaration. For exemple, the selector bellow will never draw the orange background for a disabled and focused button as the first item always applies to disabled button :

<item 
    android:state_enabled="false"
    android:drawable="@drawable/btn_red" />
<item 
    android:state_pressed="true" 
    android:state_enabled="false"
    android:drawable="@drawable/btn_orange" />

In order to draw orange background for disabled and focused buttons, and a red background for disabled buttons that are not focused we should have invert the items declaration order :

<item 
    android:state_pressed="true" 
    android:state_enabled="false"
    android:drawable="@drawable/btn_orange" />
<item 
    android:state_enabled="false"
    android:drawable="@drawable/btn_red" />

Let’s put our selector declaration in a file called btn_custom.xml in the /res/drawables directory of our Android application. Now, it’s time to define a custom button style that will apply to every buttons in the application. This can be achieve with both the /res/values/styles.xml file and the /res/values/themes.xml file. In the first one we’ll customize our button appearence (selector, text size, text color, shadow, …).

<resources>
    <style name="Button" parent="@android:style/Widget.Button">
        <item name="android:gravity">center_vertical|center_horizontal</item>
        <item name="android:textColor">#FFFFFFFF</item>
        <item name="android:shadowColor">#FF000000</item>
        <item name="android:shadowDx">0</item>
        <item name="android:shadowDy">-1</item>
        <item name="android:shadowRadius">0.2</item>
        <item name="android:textSize">16dip</item>
        <item name="android:textStyle">bold</item>
        <item name="android:background">@drawable/btn_custom</item>
        <item name="android:focusable">true</item>
        <item name="android:clickable">true</item>
    </style>
</resources>

Then, we must set this style to be used by the Android button Widget. In the /res/values/themes.xml file :

<resources>
    <style name="CustomButton" parent="android:style/Theme.NoTitleBar">
        <item name="android:buttonStyle">@style/Button</item>
    </style>
</resources>

The theme can be applied to the whole application by setting the android:theme attribute in the<application> tag of the AndroidManifest.xml file.

<application android:icon="@drawable/icon" 
    android:label="Custom button"
    android:theme="@style/CustomButton">

Now, that’s what your buttons looks like :

Android custom button

Android custom button

You can browse the full source code of the Eclipse project here :
SampleCustomButton


출처 : http://blog.androgames.net/category/android-tutorials/page/7/

setContentView앞에서 적용해야하는 것!!
View
titleView = getWindow().findViewById(android.R.id.title);
if (titleView != null) {
 
ViewParent parent = titleView.getParent();
 
if (parent != null && (parent instanceof View)) {
   
View parentView = (View)parent;
    parentView
.setBackgroundColor(Color.rgb(0x88, 0x33, 0x33));
 
}
}

출처 : http://catnest.tistory.com/54

http://mudchobo.tistory.com/479

  - HttpClient() 를 이용해서 tworld 로그인하기


http://senior.ceng.metu.edu.tr/2009/praeda/2009/01/11/a-simple-restful-client-at-android/
- How-to: Android as a RESTful Client

http://www.wiseant.net/95
 - org.apache.http.client.ClientProtocolException on Android

http://www.mail-archive.com/android-beginners@googlegroups.com/msg12690.html
- [android-beginners] Authentication and Handling Cookies in Android

http://stackoverflow.com/questions/3039137/maintain-cookie-session-in-android
- Maintain cookie session in Android

http://stackoverflow.com/questions/2511145/defaulthttpclient-get-and-post-commands-java-android
- DefaultHttpClient GET and POST commands Java Android

http://inkyungil.com/tc/entry/HttpClient의-HttpPost-메서드를-사용하여-로그인을-처리한-예제
- HttpClient의 HttpPost 메서드를 사용하여 로그인 처리 예제

http://www.anddev.org/doing_http_post_with_android-t492.html
- Doing HTTP Post with Android

http://stbaeya.com/tc/199
-안드로이드 htmlParser 이용한 로젠택배 조회 서비스 만들기.

http://www.wiseant.net/92
[링크]Android API를 이용한 Apache http client 예제

http://hc.apache.org/httpcomponents-client-dev/tutorial/html/index.html
- HttpClient Tutorial, HttpClient 레퍼런스정도.

http://www.androidpub.com/718115
쿠키를 사용한 로그인에 대한 질문, 안드로이드 펍

출처 : http://blog.naver.com/leespop/140121910438
<xml...>

<EditText

        android:imeOptions="actionDone" // actionSearch , actionGo..

/>

<Class>

editText01 = (EditText) findViewById(R.id.EditText01);


editText01.setOnEditorActionListener(new OnEditorActionListener() {
            
            @Override
            public boolean onEditorAction(TextView v, int actionId, KeyEvent event) {
                
                if(actionId == EditorInfo.IME_ACTION_DONE){ // IME_ACTION_SEARCH , IME_ACTION_GO
                   // Toast.makeText(MainActivity.this, "123", Toast.LENGTH_SHORT).show();

                     처리 할 일들..
                }
                return false;
            }
        });


android:imeOptions="...."에 따라 키보드에 원하는 값을 넣을수가 있다.

actionSearch 는 바로 위의 그림처럼 돋보기 그림이 나오고 , actionGo 는 "이동"이라는 글자가 나타나며

actionDone 은 완료라는 글자가 나타난다.


키패드를 클릭했을때 이벤트처리는 setOnEditorActionListener를 달아 처리해주면 된다.


처음그림처럼 제조사에서 만든거같은 키패드에서는 이 속성이 먹히지 않는거 같다.

입력방법을 키보드입력으로 바꾸고 실험해보니 잘된다

'Android > Tip&Tech' 카테고리의 다른 글

android titlebar 색깔 바꾸기  (0) 2011.05.03
안드로이드 로그인 관련 예제  (0) 2011.05.03
android image drag(드래그 앤 드랍)  (0) 2011.05.02
예제소스모음  (4) 2011.05.02
Custom Tab Tip  (1) 2011.04.29

리소스에서 bitmap을 읽어오고 화면에 출력한 후 touch를 이용해서 drag하는 예제

추천 참고예제 :
http://stackoverflow.com/questions/4255859/touch-and-drag-image-in-android
 

http://www.droidnova.com/playing-with-graphics-in-android-part-iv,182.html 
 

출처 : http://blackzaket.blog.me/80101582245

package com.jjihun.bitmaptest;

import android.content.Context;
import android.graphics.Bitmap;
import android.graphics.BitmapFactory;
import android.graphics.Canvas;
import android.graphics.Rect;
import android.util.AttributeSet;
import android.util.Log;
import android.view.MotionEvent;
import android.view.View;

public class BitmapView extends View {
 Bitmap bitmap;
 int width;
 int height;
 int dx;
 int dy;
 public BitmapView(Context context, AttributeSet attrs) {
  super(context, attrs);

  bitmap = BitmapFactory.decodeResource(context.getResources(), R.drawable.yuandi);
  // 얘 뒤져보면 byte[] 에서 bitmap생성하는 것도 있심

  width = bitmap.getWidth();
  height = bitmap.getHeight();
 }

 @Override
 protected void onDraw(Canvas canvas) {
  canvas.drawBitmap(
     bitmap, // 출력할 bitmap
     new Rect(0,0,width,height),   // 출력할 bitmap의 지정된 영역을 (sub bitmap)
     new Rect(dx,dy,dx+width,dy+height),  // 이 영역에 출력한다. (화면을 벗어나면 clipping됨)
     null);

  super.onDraw(canvas);
 }

 @Override
 public boolean onTouchEvent(MotionEvent event) {
  
  switch(event.getAction()) {
  case MotionEvent.ACTION_DOWN:
   break;
  case MotionEvent.ACTION_UP:
   break;
  case MotionEvent.ACTION_MOVE:
// 주루룩 drag했을 경우 히스토리가 모두 기록되어서 전달됨
   int length=event.getHistorySize();
   float sx, sy, ex, ey;
   
   if (length != 0) {
    sx = event.getHistoricalX(0);
    sy = event.getHistoricalY(0);
    ex = event.getHistoricalX(length-1);
    ey = event.getHistoricalY(length-1);

    dx += (int)(ex-sx);
    dy += (int)(ey-sy);
   }
   invalidate();
   break;
  }
  
  return true;
 }
}

'Android > Tip&Tech' 카테고리의 다른 글

안드로이드 로그인 관련 예제  (0) 2011.05.03
<안드로이드 팁]edittext에 원하는 키보드옵션넣기  (0) 2011.05.02
예제소스모음  (4) 2011.05.02
Custom Tab Tip  (1) 2011.04.29
Android selector 관련 팁  (0) 2011.04.29
‘전체’ 목록(116)
목록열기 

1.app - API Demos / 실행사진, 소스 추가  (2010/06/11)

Activity 액티비티

Hello World
Demonstrates a basic screen activity.
Code:
HelloWorld.java
Layout:
hello_world.xml
Save & Restore State
Demonstrates how an activity should save state when it is paused.
Persistent State
Demonstrates how you can save and restore preferences, which are stored even after the user closes the application.
Receive Result
Demonstrates how an activity screen can return a result to the activity that opened it.
Forwarding
Demonstrates opening a new activity and removing the current activity from the history stack, so that when the user later presses BACK they will not see the intermediate activity.
Redirection
Demonstrates how to save data to preferences and use it to determine which activity to open next.

Translucent  / 실행시 밑에 내용이 안보이게

Demonstrates how to make an activity with a transparent background.
TranslucentBlur  // 실행시 밑에 내용이 약간 보이게..
Demonstrates how to make an activity with a transparent background with a special effect (blur).

Service 서비스

Local Service Controller
Starts and stops the service class LocalService that runs in the same process as the activity, to demonstrate a service's lifecycle when using {@link android.content.Context#startService Context.startService} and {@link android.content.Context#stopService Context.stopService}.
Local Service Binding
Demonstrates binding to a service class LocalService that runs in the same process as the activity, to demonstrate using the {@link android.content.Context#bindService Context.bindService} and {@link android.content.Context#unbindService Context.unindService} methods with a service. This also shows how you can simplify working with a service when you know it will only run in your own process.
Remote Service Controller
Demonstrates starting a service in a separate process, by assigning android:process=":remote" to the service in the AndroidManifest.xml file.
Remote Service Binding
Demonstrates binding to a remote service, similar to the Local Service Binding sample, but illustrating the additional work (defining aidl interfaces) needed to interact with a service in another process. Also shows how a service can publish multiple interfaces and implement callbacks to its clients.
Service Start Arguments Controller
Demonstrates how you can use a Service as a job queue, where you submit jobs to it with {@link android.content.Context#startService Context.startService} instead of binding to the service. Such a service automatically stops itself once all jobs have been processed. This can be a very convenient way to interact with a service when you do not need a result back from it.
Code:
ServiceStartArgumentsController.java
ServiceStartArguments.java
Layout:
service_start_arguments_controller.xml
Foreground Service Controller
Controls the service class ForegroundService, which shows how you can write a Service that runs in the foreground and works on both pre-2.0 and post-2.0 versions of the platform. This example will selectively use the new foreground APIs that were introduced in Android 2.0 if they are available.

Alarm 알람 - sleep상태에서도 작동하게 해주는....

Alarm Controller
Demonstrates two ways you can schedule alarms: a one-shot alarm that will happen once at a given time, and a repeating alarm that will happen first at a given time and then continually trigger at regular intervals after that.
Code:
AlarmController.java
OneShotAlarm.java
RepeatingAlarm.java
Layout:
alarm_controller.xml
Alarm Service
Demonstrates how you can schedule an alarm that causes a service to be started. This is useful when you want to schedule alarms that initiate long-running operations, such as retrieving recent e-mails.
Code:
AlarmService.java
AlarmService_Service.java
Layout:
alarm_service.xml

Notification 공지 노티

NotifyWithText
Demonstrates popup notifications of varying length.
IncomingMessage
Demonstrates sending persistent and transient notifications, with a View object in the notification. It also demonstrated inflating a View object from an XML layout resource.

Search 검색

SearchInvoke
Demonstrates various ways in which activities can launch the Search UI.
SearchQueryResults
Demonstrates an activity that receives Search intents and handles them.
SearchSuggestionSampleProvider
Demonstrates how to configure and use the built-in "recent queries" suggestion provider.

2. appwidget - API Demos

Files 위젯

3.content - API Demos 컨텐츠

Resources

Styled Text  스타일 텍스트
Demonstrates loading styled text (bold, italic) defined in a resource file.
Resources  리소스
Demonstrates loading styled strings from a resource file, and extracting the raw text.

4.Graphics - API Demos

Drawable 이미지

ShapeDrawable
Demonstrates creating Drawables in XML.

OpenGL 오픈지엘

CameraPreview
Demonstrates capturing the image stream from the camera, drawing to a surface (extending SurfaceView) on a separate thread (extending Thread).
 
GL SurfaceView
Demonstrates how to perform OpenGL rendering in to a SurfaceView.
Code:
GLSurfaceViewActivity.java
Layout:
hello_world.xml
PolyToPoly
Demonstrates calling the {@link android.graphics.Matrix.html#setPolyToPoly(float[],int,float[],int,int)} method to translate coordinates on a canvas to a new perspective (used to simulate perspective).
DrawPoints
Demonstrates using the {@link android.graphics.Paint} and {@link android.graphics.Canvas} objects to draw random points on the screen, with different colors and strokes.
PathEffects
Demonstrates the use of {@link android.graphics.Path} and various {@link android.graphics.PathEffect} subclasses.
SurfaceView Overlay
Shows how you can place overlays on top of a SurfaceView.
Code:
SurfaceViewOverlay.java
Layout:
surface_view_overlay.xml
TouchPaint
Demonstrates the handling of touch screen events to implement a simple painting app.

5. media - API Demos

Files 미디어 플레이어

6.os - API Demos

Files 파일

7.text - API Demos

Linkify  텍스트
Demonstrates the {@link android.text.util.Linkify Linkify} class, which converts URLs in a block of text into hyperlinks.

Files 파일

8. view - API Demos


RelativeLayout 상대레이아웃

1. Vertical
Demonstrates a simple relative layout.
2. Simple Form
Demonstrates a more complex relative layout to create a form.


LinearLayout 직선레이아웃

1. Vertical
Demonstrates a simple LinearLayout, with child width set to WRAP_CONTENT.
2. Vertical (Fill Screen)
Demonstrates a simple LinearLayout, with child width set to FILL_PARENT.
3. Vertical (Padded)
Demonstrates a LinearLayout where one of the elements can expand to fill any remaining screen space (weight=1).
4. Horizontal
Demonstrates a horizontal LinearLayout, plus an expanding column.
5. Simple Form
Demonstrates nested layouts to create a user form.
6. Uniform Size
LinearLayout which uses a combination of wrap_content on itself and fill_parent on its children to get every item to be the same width.
7. Fill Parent
Demonstrates a horizontal linear layout with equally sized columns. Some columns force their height to match the parent.
8. Gravity
Demonstrates a simple linear layout with menu options demonstrating horizontal and vertical gravity options.
9. Layout Weight
Demonstrates how the layout_weight attribute can shrink an element too big to fit on screen.


ScrollView 스크롤뷰

1. Short
Demonstrates scrolling screen with buttons altermating with a text view.
2. Long
Demonstrates a longer scrolling screen similar to ScrollView1.

TableLayout 테이블 레이아웃

1. Basic
Demonstrates a basic TableLayout with identical children.
2. Empty Cells
Demonstrates a TableLayout with column-spanning rows and different child objects.
3. Long Content
Rows have different number of columns and content doesn't fit on screen: column 4 of row 2 shrinks all of the other columns
4. Stretchable
Demonstrates a TableLayout with a stretchable column.
5. Spanning and Stretchable
Demonstrates a complex TableLayout with spanning columns and stretchable columns to create a menu-like layout.
6. More Spanning and Stretchable
Similar to example 5, but with an additional "checked" column.
7. Column Collapse
Similar to example 6, but now with buttons on the bottom of the screen that enable you dynamically hide or show columns.
8. Toggle Stretch
Demonstrates toggling the "stretch" value on a column to fill the screen width.
9. Toggle Shrink
Demonstrates toggling the "shrink" value on a column to make an over-wide table shrink to fit the screen size.
10. Simple Form
Demonstrates using a table to design a user form.
11. Gravity
Demonstrates the use of advanced gravity attributes, such as center_horizontal and right|bottom to align cell contents in a table.
12. Various Widths
Demonstrates the use of elements of various widths in a table.


Baseline 기본선

Demonstrates the use of the android:layout_alignBaseline XML attribute in various page layouts.

1. Top
Demonstrates the default baseline alignment in a simple LinearLayout with items at the top of the screen.
 
 <LinearLayout xmlns:android="http://schemas.android.com/apk/res/android"
    android:orientation="horizontal"
    android:layout_width="fill_parent"
    android:layout_height="wrap_content">
    <TextView
        android:layout_width="wrap_content"
        android:layout_height="wrap_content"
        android:layout_marginRight="3dip"
        android:text="@string/baseline_1_label" />
    <Button
        android:layout_width="wrap_content"
        android:layout_height="wrap_content"
        android:layout_marginRight="3dip"
        android:text="@string/baseline_1_button" />
    <TextView
        android:layout_width="wrap_content"
        android:layout_height="wrap_content"
        android:textSize="20sp"
        android:text="@string/baseline_1_bigger" />
</LinearLayout>
2. Bottom
Demonstrates the default baseline alignment in a simple LinearLayout with items at the bottom of the screen.
3. Center
Demonstrates the default baseline alignment in a simple LinearLayout with items in the center of the screen.
4. Everywhere
Demonstrates the default baseline alignment in a complex LinearLayout.
 
 <LinearLayout xmlns:android="http://schemas.android.com/apk/res/android"
    android:orientation="horizontal"
    android:layout_width="fill_parent"
    android:layout_height="fill_parent">
    <TextView
        android:layout_width="wrap_content"
        android:layout_height="wrap_content"
        android:layout_marginRight="3dip"
        android:text="@string/baseline_4_label" />
    <Button
        android:layout_width="wrap_content"
        android:layout_height="wrap_content"
        android:layout_marginRight="3dip"
        android:layout_gravity="center_vertical"
        android:text="@string/baseline_4_button" />
    <TextView
        android:layout_width="wrap_content"
        android:layout_height="wrap_content"
        android:layout_gravity="bottom"
        android:textSize="20sp"
        android:text="@string/baseline_4_bigger" />
    <TextView
        android:layout_width="wrap_content"
        android:layout_height="wrap_content"
        android:layout_marginRight="3dip"
        android:text="@string/baseline_4_label_2" />
    <TextView
        android:layout_width="wrap_content"
        android:layout_height="wrap_content"
        android:layout_marginRight="3dip"
        android:layout_gravity="bottom"
        android:text="@string/baseline_4_label_3" />
</LinearLayout>
6. Multi-line
Demonstrates a baseline alignment with a multiline field.
7. Relative
Demonstrates baseline alignment in a RelativeLayout.
 <RelativeLayout xmlns:android="http://schemas.android.com/apk/res/android"
    android:layout_width="fill_parent"
    android:layout_height="fill_parent">
    <TextView android:id="@+id/anchor"
        android:layout_width="wrap_content"
        android:layout_height="wrap_content"
        android:layout_alignParentTop="true"
        android:layout_alignParentLeft="true"
        android:textStyle="bold"
        android:text="@string/baseline_7_fat" />
    <TextView
        android:layout_width="wrap_content"
        android:layout_alignParentRight="true"
        android:layout_alignBaseline="@id/anchor"
        android:layout_height="wrap_content"
        android:text="@string/baseline_7_lean" />
</RelativeLayout>
BaselineNested1
Demonstrates baseline aligning specific elements in three parallel vertical LinearLayout objects.
BaselineNested2
Demonstrates baseline aligning specific elements in three mixed vertical and horizontal LinearLayout objects.
BaselineNested3
Demonstrates baseline alignment within nested LinearLayout objects.

Radio Group 라디오그룹

Radio Group
Demonstrates using radio buttons and capturing the selected item.

ScrollBars 스크롤바

1. Basic
Demonstrates a scrollable LinearLayout object.
2. Fancy
Demonstrates a scrollable LinearLayout object with a custom thumb slider image.

Visibility 보이기/안보이기/사라지기

Visibility
Demonstrates toggling the visibility of a View object between visible, invisible, and gone.

Lists 리스트

1. Array
Demonstrates binding a ListAdapter to a string array as a data source, and displaying the elements on the screen.
2. Cursor (People)
Demonstrates binding results from a database query to a field in a template.
3. Cursor (Phones)
Demonstrates binding multiple columns from a database query to fields in a template.
4. ListAdapter
Demonstrates implementing a custom ListAdapter to return View objects laid out in a custom manner.
5. Separators
Demonstrates implementing a custom ListAdapter that includes separators between some items.
6. ListAdapter Collapsed
Demonstrates another custom list adapter with that returns expandible items.
 
7. Cursor (Phones)
Demonstrates a list adapter where data comes from a Cursor object.
8. Photos
Demonstrates a list activity that uses a custom ListAdapter, setting the view for an empty item, and also how to customize the layout of a ListActivity.
 

Custom 일반

CustomView
Demonstrates implementing a custom view subclass.

ImageButton 이미지버튼

ImageButton
Demonstrates an ImageButton: a button with an arbitrary graphic on it.

Date Widgets 데이타 위젯

1. Dialog
Demonstrates the DatePickerDialog and TimePickerDialog picker dialogs.
2. Inline
Demonstrates using a TimePicker directly in a layout without using a confirmation button or dialog.

Gallery 갤러리 이미지

1. Icons
Demonstrates implementing a Gallery widget and extending GalleryAdapter to create a custom class to serve out source images to the widget.
2. People
Demonstrates populating a Gallery with images from the contacts photos.

Spinner

Spinner
Demonstrates populating two Spinner widgets with values.

Grid 그리드

1. Icon Grid
Demonstrates populating a GridView widget with a list of applications using a custom ListAdapter object.
 
2. Photo Grid
Demonstrates populating a GridView widget with images using a custom ListAdapter object.
 

ImageSwitcher

ImageSwitcher
Demonstrates using the ImageSwitcher widget with a custom Adapter.

TextSwitcher

TextSwitcher
Demonstrates using the TextSwitcher widget.

Animation 애니메이션

1. Shake
Demonstrates a simple tweened animation (android.view.animation.Animation).
2. Push
Demonstrates a variety of transformations (android.view.animation.Animation), including fading, motion, and rotation.

Controls

1. Theme White
Demonstrates a variety of common form type widgets, such as check boxes and radio buttons using the white theme.
 
2. Theme Dark
Demonstrates a variety of common form type widgets, such as check boxes and radio buttons using the dark theme.

Auto Complete 자동 완성

1. Screen Top
Demonstrates the use of AutoCompleteTextView, an autocomplete dropdown box below a text box, with data taken from an array.
2. Screen Bottom
Demonstrates an autocomplete box above a text box.
3. Scroll
Demonstrates an autocomplete text box in the midst of a vertical list.
4. Contacts
Demonstrates an autocomplete text box that gets its content from a database query.
5. Contacts with Hint
Demonstates an autocomplete text box that understands the * wildcard.

Progress Bar 프로그레스 바

1. Incremental
Demonstrates large and small rotating progress indicators that can be incremented or decremented in units.
2. Smooth
Demonstrates large and small continuously rotating progress indicators used to indicate a generic "busy" message.
3. Dialogs
Demonstrates a ProgressDialog, a popup dialog that hosts a progress bar. This example demonstrates both determinate and indeterminate progress indicators.
4. In Title Bar
Demonstrates an Activity screen with a progress indicator loaded by setting the WindowPolicy's progress indicator feature.

Focus 초점

1. Vertical
Demonstrates how to block selection of a specific screen element.
2. Horizontal
Demonstrates how to change the order of which screen element is selected when the user presses arrow keys.
3. Circular
Another version of Focus2.


posted by 불꽃남자

'Android > Tip&Tech' 카테고리의 다른 글

<안드로이드 팁]edittext에 원하는 키보드옵션넣기  (0) 2011.05.02
android image drag(드래그 앤 드랍)  (0) 2011.05.02
Custom Tab Tip  (1) 2011.04.29
Android selector 관련 팁  (0) 2011.04.29
ndroid Fake Iphone UI 2 Source  (0) 2011.04.29


출처 : http://android.attemptone.com/layouts/custom-tabs/ 


Tabs can be a difficult component when you first start building Android applications.  To do something as simple as change the height of the tabs you need to build a view and pass it to setIndicator in the TabSpec.  It might sound confusing but hopefully this code sample helps.  It uses custom tab backgrounds, tab height, and programmatic tab creation.


Image Files:

Custom Tab Images

MyActivity.java

import android.app.Activity;
import android.graphics.Color;
import android.os.Bundle;
import android.view.Gravity;
import android.view.View;
import android.widget.FrameLayout;
import android.widget.LinearLayout;
import android.widget.TabHost;
import android.widget.TabWidget;
import android.widget.TextView;
import android.widget.LinearLayout.LayoutParams;
import android.widget.TabHost.TabContentFactory;
import android.widget.TabHost.TabSpec;

//Custom Tabs
public class MyActivity extends Activity {

int tabHeight = 40;


@Override
public void onCreate(Bundle savedInstanceState) {

super.onCreate(savedInstanceState);
LinearLayout main = new LinearLayout(this);
main.setOrientation(LinearLayout.VERTICAL);
setContentView(main);

TabHost tabs = new TabHost(this);
tabs.setId(android.R.id.tabhost);
main.addView(tabs);

TabWidget tabWidget = new TabWidget(this);
tabWidget.setId(android.R.id.tabs);
tabs.addView(tabWidget);

FrameLayout tabContent = new FrameLayout(this);
tabContent.setId(android.R.id.tabcontent);
tabContent.setPadding(0, tabHeight, 0, 0);
tabs.addView(tabContent);

TextView content = new TextView(this);
content.setText("This is the Frame Content");
content.setId(100);
tabs.setup();

TabSpec tspec1 = tabs.newTabSpec("Tab1");
tspec1.setIndicator(makeTabIndicator("One"));
tspec1.setContent(new PreExistingViewFactory(content));
tabs.addTab(tspec1);

TabSpec tspec2 = tabs.newTabSpec("Tab2");
tspec2.setIndicator(makeTabIndicator("Two"));
tspec2.setContent(new PreExistingViewFactory(content));
tabs.addTab(tspec2);

TabSpec tspec3 = tabs.newTabSpec("Tab3");
tspec3.setIndicator(makeTabIndicator("Three"));
tspec3.setContent(new PreExistingViewFactory(content));
tabs.addTab(tspec3);

}

private TextView makeTabIndicator(String text){

TextView tabView = new TextView(this);
LayoutParams lp3 = new LayoutParams(LayoutParams.WRAP_CONTENT, tabHeight, 1);
lp3.setMargins(1, 0, 1, 0);
tabView.setLayoutParams(lp3);
tabView.setText(text);
tabView.setTextColor(Color.WHITE);
tabView.setGravity(Gravity.CENTER_HORIZONTAL|Gravity.CENTER_VERTICAL);
tabView.setBackgroundDrawable( getResources().getDrawable(R.drawable.tab_indicator));
tabView.setPadding(13, 0, 13, 0);
return tabView;

}

class PreExistingViewFactory implements TabContentFactory{

private final View preExisting;
protected PreExistingViewFactory(View view){
preExisting = view;
}

public View createTabContent(String tag) {
return preExisting;
}

}

}

res/drawable/tab_indicator.xml


<?xml version="1.0" encoding="utf-8"?>
<selector xmlns:android="http://schemas.android.com/apk/res/android">
<!-- Non focused states -->
<item android:state_focused="false"
android:state_selected="false"
android:state_pressed="false"
android:drawable="@drawable/tab_deselect" />
<item android:state_focused="false"
android:state_selected="true"
android:state_pressed="false"
android:drawable="@drawable/tab_select" />

<!-- Focused states -->
<item android:state_focused="true"
android:state_selected="false"
android:state_pressed="false"
android:drawable="@drawable/tab_deselect" />
<item android:state_focused="true"
android:state_selected="true"
android:state_pressed="false"
android:drawable="@drawable/tab_select" />


<!-- Pressed -->
<item android:state_pressed="true"
android:drawable="@drawable/tab_focus" />
</selector>


Android selector  ├뷰 

2011/01/05 11:40

복사http://blog.naver.com/jolangma/150100210916

출처:

step 1. View의 각 상태에 맞는 이미지를 준비합니다.

 res/drawable 폴더내에 두어야하는건 아시죠?!


(image를 nine patch해서 사용하시면 좋겠죠...^~^)

 normal

 활성화 상태, View.setEnabled(true)상태와 같다.

 빠져서는 안되는 필수요소입니다.

 disable

 비활성화 상태, View.setEnabled(false)상태와 같다.

 필요할 때 선언할 수 있는 선택요소입니다.

 focused

 EditText에서 입력 대기 상태, 즉 커서가 깜박이는 경우에 해당합니다.

 또는 비활성화 상태에서 selected 된 상태입니다.

 필요할 때 선언할 수 있는 선택요소입니다.

 pressed

 Button 종류의 View가 눌려진 상태, View 종류의 View가 터치된 상태입니다.

 빠져서는 안되는 필수요소입니다.

 selected

 device의 트랙볼이나 dpad방향키로 View가 선택된 상태. 

 이 때, state_window_focused 상태는 true가 됩니다.

 요즘 기기들 중 쿼티 자판이 있는 경우를 제외한 기기들은 이 상태를 쓸 경우가 별로 없습니다. 왜냐하면 기본 입력 방식이 터치니깐요...=_=

 필요할 때 선언할 수 있는 선택요소입니다.


step 2. res/drawable 폴더내에 아래와 같은 형식의 .xml 파일을 생성합니다.

 res/drawable-hdpi/btn_white_stone.xml


<selector xmlns:android="http://schemas.android.com/apk/res/android">

    /!-- 아래 두 개의 선언은, 그래도 혹시 모르니 selected 상황이 해제되었을 

          때를 대비해 추가해 두는게 좋습니다. --/

    <item android:state_window_focused="false" android:state_enabled="true"

        android:drawable="@drawable/btn_normal" />

    <item android:state_window_focused="false" android:state_enabled="false"

        android:drawable="@drawable/btn_disable" />


    <item android:state_pressed="true" 

        android:drawable="@drawable/btn_square_pressed" />


    <item android:state_focused="true" android:state_enabled="true"

        android:drawable="@drawable/btn_square_selected" />


     /!-- 아래의 선언이 없을 경우 selected 상황에서는 버튼이 보이지 않습니다. --/

    <item android:state_enabled="true"

        android:drawable="@drawable/btn_square_normal" />


    <item android:state_focused="true"

        android:drawable="@drawable/btn_square_focused" />    


    /!-- 아래의 선언이 없을 경우 selected 상황에서는 버튼이 보이지 않습니다. --/

    <item

         android:drawable="@drawable/btn_square_disable" />

</selector>

 그래서 필자는 보통은 아래와 같이,

 보통상태와 버튼이나 뷰가 눌러졌을 때의 상태, 두 경우만 선언해서 사용하고 있습니다.


<selector xmlns:android="http://schemas.android.com/apk/res/android">

    <item android:state_window_focused="false" android:state_enabled="true"

        android:drawable="@drawable/btn_help_normal" />


    <item android:state_pressed="true" 

        android:drawable="@drawable/btn_help_pressed" />


    <item android:state_enabled="true"

        android:drawable="@drawable/btn_help_normal" />


</selector>


step 3. Button의 background로 위에서 생성한 drawable을 지정합니다.

 res/layout/layout.xml


<Button

android:layout_width="wrap_content"

android:layout_height="wrap_content"

android:text="Test Button"

android:background="@drawable/btn_white_stone"

/>

[출처] Android selector|작성자 jolangma


출처 : http://www.androidside.com/bbs/board.php?bo_table=B46&wr_id=13466

TITLE : Android Fake Iphone UI 2 Source

Date : 2010/08/06

Description :

This is Source that make Iphone style UI by android slector button.

Download Link : iphoneUI2

Reference Site :

안드로이드 Selector 버튼을 하단에 4개 배치하여  아이폰 하단의 네비게이션 UI를 배낀 소스

안드로이드의 다양한 에니메이션 기능과 확장성은 아이폰 스타일의 UI도 꾸밀 수 있다.

한국에서 안드로이드폰이 아이폰보다 많이 팔렸다는 뉴스가 나옴에도 불구하고

아직까지 모바일UI에 대세는 아이폰UI라는 점이 참 아이러니 하다 .

안드로이드 기본UI도 충분히 강력하고 효율적이라고 생각하지만 (비록 투박하지만),

주문하는 입장에서 아이폰UI를 부탁하니 어쩔 수 없는 일이다. 

1. 하단에 이미지버튼 4개를 배치하기 위해서 selector xml과 이미지파일을 Drawble 에 등록한다.

셀렉터는 defult와 pressed로 구별해서 정의한다.

 <selector xmlns:android=”http://schemas.android.com/apk/res/android“>
     <item android:state_pressed=”true”
           android:drawable=”@drawable/home_1″ /> <!– pressed –>
    
     <item android:drawable=”@drawable/home_0″ /> <!– default –>
 </selector>

2. 상단의 TextView와 하단의 LinearLayout (버튼4개 묶음)은 RelativeLayout 으로 구성하여서

해상도가 변경되어도 버튼들이 하단에 위치하게 한다.

3. 해상도가 변경되어도 레이아웃이 유지된다.

하단의 이미지버튼을 9Patch로 작업한다면 아래처럼 깨지지도 않을 것이다.

(본 예제는 초상권때문에 버튼 만드는 것도 엄청 고생했기때문에 나인패치까지는고려안햇슴;)

4. 버튼을 눌렀을 때 클릭리스너는 각각의 Listner는 Activity에서 정의했고,

XML에서 android:onClick=”ClickHandler” 속성으로 달아주었다.

4. 이 과정은 본 예제의 핵심으로 이미지 버튼으로 구성시 Activity가 쌓이게 되는데,

android:LunchMode=”singleTask”로 설정해 줌으로써 Activity가 쌓이지 않고 Singleton Pattern으로 1개씩만 생성된다.

<P.S> 구현된 화면을 보니, 아무래도 화면전환 시 하단 네비게이션이 같이 움직여서 어색하다..

하단에 버튼을 배치하고 viewFlipper나 TabWidget을 활용하면 네비게이션 움직임 없이 구성될 듯 싶으나,

예제의 특성 상 Activity 이동으로 간단하게 구현해 보았다.

Creative Commons License
이 저작물은 크리에이티브 커먼즈 저작자표시 3.0 Unported 라이선스에 따라 이용할 수 있습니다.

http://test.androday.com:7788/blog/?p=406

태스크란? (Task, Activity Stack)어피니티란? (Android Affinity)플래그란? (Android Flag)  Android APP / 컴퓨터활용 

2011/03/16 11:48


http://blog.naver.com/oklmg/70105002506


태스크란? (Task, Activity Stack)

어피니티란? (Android Affinity)
플래그란? (Android Flag)


안드로이드 태스크란? (Android Task, Activity Stack)


-  Task는 어플리케이션에서 실행되는 액티비티를 보관하고 관리하며 Stack형태의 연속된 Activity로 이루어진다


- 선입후출(First In Last Out)형태로 나중에 적재된 액티비티일 수록 가장 먼저 사용된다

  만약 1페이지>2페이지>3페이지 순으로 액티비티를 이동했을때 실행순서대로 Task에 push해 놓았다가

  back버튼을 누르면 3페이지>2페이지>1페이지순으로 Task에서 pop시켜 되돌아 간다고 생각하면 된다


- 서로 다른 어플리케이션간의 이동에도 Task를 이용해 사용자 경험(UX)를 유지시켜 준다


- 최초적재 액티비티는 Root Activity 라고 하며 어플리케이션 런처로부터 시작된다


- 마지막으로 적재되는 액티비티는 Top Activity 라고 하며 현재 화면에 활성화 되어있는 액티비티를 말한다


- Task내에는 서로 다른 어플리케이션의 액티비티들이 포함될 수 있어 어플리케이션에 경계없이 

  하나의 어플리케이션인것 처럼 보이게 해준다


- Task의 Stack내에 존재하는 액티비티들은 모두 묶여서 background와 foreground로 함께 이동한다

  홈버튼 클릭(task interrupt => background 이동), 홈버튼 롱클릭(recent task => foreground 이동)


- Flag를 사용하여 Task내 액티비티의 흐름을 제어할 수 있다


어피니티란? (Android Affinity)


- 어플리케이션 내의 액티비티들은 하나의 어피니티를(affinity:친화력) 가지고 있다


- AndroidManifest 에서 <activity> 요소의 taskAffinity 속성을 사용해 개별 affinity가 지정 가능하다


- FLAG_ACTIVITY_NEW_TASK 플래그를 가진 인텐트 객체로 부터 호출된 allowTaskReparenting 속성을

  True로 가지고 있는 액티비티에 한해 affinity가 동작한다


- 위 조건이 만족한 상황에서 시작된 액티비티는 자신과 동일한 어피니티를 갖는 태스크가 있을경우

  해당 태스크로 이동한다


- 즉, [b]어피니티를 가진 A액티비티가 호출되어 해당 태스크에 속해있을때 [b]어피니티를 가진 태스크가

  호출되면 A액티비티는 [b]어피니티를 가진 태스크로 이동한다


- 어피니티에 의해 태스크가 이동된 후에 back버튼으로 반환시 원래 해당하던 태스크로 돌아간다


- 하나의 어플리케이션내에서 하나 이상의 기능을 갖는 어플리케이션이 존재할경우 각 액티비티별로 다른

  어피니티를 지정해 관리할 수 있다


플래그란? (Android Flag)


- AndroidManifest 에서 플래그를 사용할때에는 <activity> 요소의 launchMode 속성을 사용하며

  launchMode에서 사용가능한 속성은 다음과 같이 4가지만 가능하다


  standard: 

  스택중 어느곳에나 위치 가능하며 여러개의 인스턴스가 생성가능하다


  singleTop: 

  스택중 어느곳에나 위치 가능하며 여러개의 인스턴스가 생성가능하고 호출한 activity와 현재

  최상위 activity가(top activity) 동일한 경우 최상위 activity가 재사용 된다(기존 최상위 activity는 pop)


  singleTask: 

  루트 액티비티로만 존재하며 하나의 인스턴스만 생성가능하다(타 task에서 동일 activity 사용불가)

  다른 액티비티 실행시 동일 Task내에서 실행이 가능하다


 singleInstance: 루트 액티비티로만 존재하며 하나의 인스턴스만 생성가능하고 태스크내에 해당

  액티비티 하나만 속할 수 있어 다른 액티비티를 실행시키면 새로운 Task가 생성되어

  (FLAG_ACTIVITY_NEW_TASK와 동일) 그 Task내에 포함된다


- 소스코드에서 플래그를 사용하고 싶을때에는 Intent에 addFlags() 또는 setFlags() 메소드를 사용한다


  FLAG_ACTIVITY_NEW_TASK: 

  동일 affinity의 task가 있으면 그곳에 실행되고 아니면 새로운 task를 실행


  FLAG_ACTIVITY_SINGLE_TOP: 

  상단 singleTop과 같으며, 실행시 재사용 액티비티의 실행은 onPause(), onNewIntent(), onResume()

  순으로 호출된다

  ☞ [B]를 single top설정: [A][B] 상태에서 [B] 호출시 => [A][재사용된B]

  ☞ [B]를 single top설정: [B][A] 상태에서 [B] 호출시 => [B][A][B]


  FLAG_ACTIVITY_NO_HISTORY:

  해당 액티비티는 재활성화시(back키를 눌러 다시 활성화될때) pop 된다

  ☞ [B]를 no history설정: [A][B][A] 상태에서 back키 사용시 [A]가 pop 되고 [B] 역시 

  no history에 의해 pop => [A]


  FLAG_ACTIVITY_REORDER_TO_FRONT:

  activity 호출시 이미 같은 activity가 task내에 있으면 같은 activity는 pop 시키고 해당 activity가 push 된다

  ☞ [A]를 reorder to front설정: [A][B] 상태에서 [A] 호출시 같은 activity인 [A]가 pop되고 => [B][A]


  FLAG_ACTIVITY_CLEAR_TOP:

  해당 task에 있는 모든 activity를 pop 시키고 해당 activity가 root activity로 task에 push된다

  ☞ [A]를 clear top설정: [A][B] 상태에서 [A] 호출시 모두 pop되고 => [A]

  단, 해당 플래그는 액티비티를 모두 onDestroy() 시킨 후 새롭게 onCreate() 시키기 때문에 [A]를

  유지하려면 FLAG_ACTIVITY_SINGLE_TOP 플래그와 함께 사용하면 된다


http://developer.android.com/reference/android/content/Intent.html#FLAG_ACTIVITY_BROUGHT_TO_FRONT


Clear Task


- Task를 오랫동안 사용하지 않고 방치해 두면 시스템은 Root Activity를 제외한 모든 액티비티를 Clear 시킨다

- 이러한 동작은 Activity의 속성을 수정하여 제어할 수 있다


  alwaysRetainTaskState:

  Task의 Root Activity에 true로 설정되어 있다면 상단에 언급되었던 동작은 발생하지 않으며 Task는

  오랜 시간 이후에도 Stack에 있는 모든 Activity를 유지한다


  clearTaskOnLaunch:

  이 속성이 true로 설정되어 있으면 alwaysRetainTaskState 와 정반대로 사용자가 Task를 떠났다가

  다시 돌아올 때마다 항상 Stack은 Root Activity로 정리된다


  finishOnTaskLaunch:

  이 속성은 clearTaskOnLaunch와 유사하지만 전체 Task가 아닌 단일 Activity에서 동작한다

  그리고 그것은 Root Activity를 포함한 어떤 Activity가 사라지는 원인이 될 수도 있다

  true로 설정되어 있을 때, Activity는 현재 Session 동안 Task의 일부만 유지한다

  만일 사용자가 해당 Task를 벗어났다가 다시 돌아오면 더이상 존재하지 않는다

'Android > Tip&Tech' 카테고리의 다른 글

Android selector 관련 팁  (0) 2011.04.29
ndroid Fake Iphone UI 2 Source  (0) 2011.04.29
c2dm 에 관한 또다른 참고내용  (0) 2011.04.26
android c2dm sample source  (1) 2011.04.26
c2dm simple example  (0) 2011.04.25

아이폰4를 사용하며 안드로이드를 공부하는 사람으로서 지내다보니 아이폰과 안드로이드OS 폰에는 각각 장단점이 많이 있다 느껴진다.
 
 그 중에 하나가 바로 push 방식.
 서버-클라이언트 관계에서 지금까지는 대부분 클라이언트에서 서버에 요청하는 방식(Pull) 이 많이 사용되었다. 하지만 최근 스마트폰 같이 테블렛 기기가 많이 공급되면서 클라이언트가 서버에게 요청하고 다시 자료를 받는 식의 방법은 패킷을 많이 소모하게 되여 서버에서 새로운 소식이 있을 때 클라이언트로 알려주는 Push방식이 많이 사용된다.
 
 아이폰에서는 이미 서비스가 되고있어 많이 사용되었지만 안드로이드에서는 2.2 에서 부터 서비스를 시작하였다. 정확히는 모르겠지만 아직 구글에서도 테스트 중이여서 정확도 100프로같이 잘 된다고는 보장하지 못하는거 같다.

 무튼 이렇게 안드로이드에서 서비스를 시작한 것이 C2DM(Cloud To Device Messaging Framework) 이다.
 자세한 정보는 http://code.google.com/intl/ko-KR/android/c2dm/index.html 에 있지만 난 뭔소린지 잘 모르겠다.

 그렇다면 이제 순서대로 C2DM을 이용해서 Push Notification을 만들어보자.
 
 만들기 전에 필요한 준비물이 있다!? 
  1. Android OS 2.2 (Proyo) 이상의 단말 (에뮬레이터는 안되는 걸로 알고있지만 될 수도 있음)
  2. 준비된 단말은 마켓에 로그인이 가능한(한마디로 Google 계정이) 있어야 하고 로그인이 되어있어야 한다.
  3. 그리고 Third Party Server 뭐라고 하는데 잘 모르겠고 단순히 Google에 Push 기능을 사용하고 싶고 그래서 당신들 서버를      사용하고 싶다는 신청서를 제출하면 된다. 신청은 http://code.google.com/intl/ko-KR/android/c2dm/signup.html <-- 여기서
    -. 신청을 할 때 Name of Your Android App 이 항목에는 C2DM 기능을 사용할 어플리케이션의 페키지 명을 적으면 된다.
      만약에 내가 com.tistory.j2enty.c2dm 이라는 패키지명을 사용했다면 그래도 적어서 내면 되더라...
       그리고 모 나머지는 읽어보고 적어내거나 선택하면 된다고 생각한다. (몇번을 테스트하면서 안되길래 저 패키지명이 잘못되       었나를 여러번 생각해봐서.. 다른 사람도 그럴꺼같아서....;;)
    -. 신청을 완료하고 나면 신청할 때 기입했던 메일계정에 영문의 메일이 하나 온다. (예전에는 오래걸렸는데 요즘은 바로바로         회신을 보내주는 듯..) 무튼 이 메일 (보낸이 android-c2dm)이 오면 사용이 가능해진 것이다.

 준비가 완료 되었다면 이제 부터...
 
-. Android App
 1. 일단 다 만들어놓고 안됐었던 원인이 있는 manifest 파일정보에 대한 설명  
 

AndroidManifest.xml 접기

<?xml version="1.0" encoding="utf-8"?>


<manifest xmlns:android="http://schemas.android.com/apk/res/android"


package="com.tistory.j2enty.c2dm"


android:versionCode="1"


android:versionName="1.0">


<application android:icon="@drawable/icon" android:label="@string/app_name">


<activity android:label="@string/app_name" android:name="C2dmActivity">


<intent-filter>


<action android:name="android.intent.action.MAIN" />


<category android:name="android.intent.category.LAUNCHER" />


</intent-filter>


</activity>


<receiver android:name="C2dmReceiver"


android:permission="com.google.android.c2dm.permission.SEND">


<intent-filter>


<action android:name="com.google.android.c2dm.intent.RECEIVE"/>


<category android:name="com.tistory.j2enty.c2dm" />


</intent-filter>


<intent-filter>


<action android:name="com.google.android.c2dm.intent.REGISTRATION"/>


<category android:name="com.tistory.j2enty.c2dm" />


</intent-filter>


</receiver>


<activity android:name="ShowMsgActivity"></activity>


</application>


<permission android:name="com.tistory.j2enty.c2dm.permission.C2D_MESSAGE" android:protectionLevel="signature"/>


<uses-permission android:name="com.tistory.j2enty.c2dm.permission.C2D_MESSAGE"/>


<uses-permission android:name="com.google.android.c2dm.permission.RECEIVE"/>


<uses-permission android:name="android.permission.INTERNET"/>


<uses-permission android:name="android.permission.WAKE_LOCK" />


<uses-permission android:name="android.permission.GET_ACCOUNTS" />


<uses-permission android:name="android.permission.USE_CREDENTIALS" />


<uses-permission android:name="android.permission.READ_PHONE_STATE" />


<uses-sdk android:minSdkVersion="8" />

</manifest> 

AndroidManifest.xml 접기

 
  가장 먼저 퍼미션에서 C2D_MESSAGE 에 대한 퍼미션을 줄 때에는 앞에 개발중인 어플리케이션의 패키지 명을 먼저 적는다.
   ex)패키지명.permission.C2D_MESSAGE
  그 아래 있는 uses-permission 에서도 똑같이

  그리고 com.google.android.c2dm.permission.RECEIVE 라는 퍼미션은 c2dm메시지를 받을 수 있게 해주는 퍼미션이고 그 밑에  는 인터넷사용, 휴대폰의 슬립상태 접근, 계정접근, 핸드폰의 현재 상태 읽기 등의 퍼미션을 추가한다.

  또한 중요한 것이 receiver 인데 서버에서 오는 메시지에 대한 처리를 모두 receiever에서 해주기 때문이다. 여기서 추가하는    Action 은 메시지를 받았을 경우와 c2dm의 사용을 등록했을 때에 대한 action을 등록하고 카테고리는 현재 작업중인 패키지명을  추가해주면된다.

 2. Activity에서 필요한 코드
 

C2dmActivity 닫기

switch(v.getId())


{


case R.id.c2dm_btnRegist:


//Android C2DM에Push메시지를 받겠다는메시지를보내는Intent


//정상적으로등록이되면Android C2DMServer쪽에서 인증키를보내준다.


//이인증키는해당어플리케이션과해당기기를대표하는인증키로서버에서메시지를보낼때사용되며


//서버에등록을할때마다인증키는달라진다.


Intent registrationIntent =new Intent("com.google.android.c2dm.intent.REGISTER");


//인텐트에함께보내는내용은"app"과"sender"가있는데이두Key는 모두google에서 제시한것이기때문에


//임의로변경이불가능하다.


//app에는 해당어플리케이션정보를담아서보내고


//sender에는 개발자의주소를담아서보낸다.


registrationIntent.putExtra("app", PendingIntent.getBroadcast(this, 0,new Intent(), 0));


registrationIntent.putExtra("sender",mailAddress);


startService(registrationIntent);


break


case R.id.c2dm_btnUnregist:


//Android C2DM에Push메시지를 그만받겠다는메시지를보내는Intent


Intent unregIntent =new Intent("com.google.android.c2dm.intent.UNREGISTER");


unregIntent.putExtra("app", PendingIntent.getBroadcast(this, 0,new Intent(), 0));


startService(unregIntent);


break


default:


break

}

C2dmActivity 닫기


  이 코드에 대한 설명은 위에 코드에 주석을 추가하였다.

main.xml 닫기

<?xmlversion="1.0"encoding="utf-8"


<LinearLayoutxmlns:android="http://schemas.android.com/apk/res/android"


android:orientation="vertical"


android:layout_width="fill_parent"


android:layout_height="fill_parent"


>


<Buttonandroid:layout_width="fill_parent"


android:layout_height="wrap_content"


android:text="가입"


android:id="@+id/c2dm_btnRegist"


/>


<Buttonandroid:layout_width="fill_parent"


android:layout_height="wrap_content"


android:text="해지"


android:id="@+id/c2dm_btnUnregist"


/>

</LinearLayout>

main.xml 닫기


 3. 리시버에 대한 코드

C2dmReceiver 닫기

/**


*<pre>


* C2DM의사용신청후서버에서오는메시지를처리하는메소드


*</pre>


*


*@param context


*@param intent


*/


privatevoid handleRegistration(Context context, Intent intent)


{


Log.e("C2DM","handleRegistration");


//서버에서넘어오는메시지의내용에key이름 "registration_id"에는이기기에만사용하는인증키값이담겨서넘어온다.


String registration = intent.getStringExtra("registration_id");


if (intent.getStringExtra("error") !=null)


{


Log.e("C2DM","error");


}


elseif (intent.getStringExtra("unregistered") !=null)


{


Log.e("C2DM","unregistered");


}


elseif (registration !=null)


{


Log.e("C2DM", registration);


}


}


/**


*<pre>


* C2DM서버에서오는메시지(개발자측이보내는메시지)를처리하는메소드


*</pre>


*


*@param context


*@param intent


*/


privatevoid handleMessage(Context context, Intent intent)


{


Log.e("C2DM","handleMessage");


String title = intent.getStringExtra("title");


String msg = intent.getStringExtra("msg");


// 화면깨우기


PushWakeLock.acquireCpuWakeLock(context);


Intent i =new Intent(context, ShowMsgActivity.class);


Bundle b =new Bundle();


b.putString("title", title);


b.putString("msg", msg);


i.putExtras(b);


i.setFlags(Intent.FLAG_ACTIVITY_NEW_TASK);


context.startActivity(i);

}

C2dmReceiver 닫기


  리시버에 대한 소개도 주석과 함께 추가하였다.
  다만 여기서 각각의 메소드를 호출 할 때 handleRegeistration 의 경우에는 Reciever에서 받은 인텐트 액션이    com.google.android.c2dm.intent.REGISTRATION 일 경우 호출하게 되며
  handleMessage 메소드의 경우에는 com.google.android.c2dm.intent.RECEIVE 라는 인텐트 액션일 경우 호출하게 한다.

  이 예제에서는 화면깨우기라는 부분을 추가하였다. 이 부분은 지금 현재 안드로이드 폰이 슬립상태일 경우 이 상태를 깨어난 상  태로 바꿔주게 되며 서버에서 받은 메시지를 보여준다. 이 에 대한 처리는 c2dm메시지를 받았을 경우 해주는 부분이기 때문에  Android notification을 사용해서 nitify 해주거나 진동을 사용해서 알려주거나 하는 등의 방법으로 알려주며 각 어플리케이션의 특  징과 개발자의 입맛에 따라 구현이 가능할 것이다.

 이렇게 만들어진 어플리케이션을 실행하고 가입버튼을 누르게되면 C2DM에 등록을 하고 난 후 넘어오는 값이 이 기기에 대한 인증키이며 이 인증키값을 이용해서 서버에서 메시지를 보내게 된다.

 여기서 얻게 되는 키값을 임의로 arrId 라고 하겠다.
 
-. 내 어플리케이션에 대한 인증키 받기.
 

Auth_android 닫기

publicclass Auth_android


{


privatestatic StringHOST ="https://www.google.com/accounts/ClientLogin"


privatestatic StringEMAIL ="abcdedfe@gmail.com"      //사용자 아이디


privatestatic StringPASS ="password"                 //비밀번호


privatestatic StringSOURCE ="androidpush-test. nexusone-2.2"   //어플리케이션에 대한 간단한 설명


publicstaticvoid main( String[] args )throws Exception


{


try {


StringBuffer postDataBuilder =new StringBuffer();


postDataBuilder.append("Email=" +EMAIL);


postDataBuilder.append("&Passwd=" +PASS);


postDataBuilder.append("&accountType=GOOGLE");


postDataBuilder.append("&source=" +SOURCE);


postDataBuilder.append("&service=ac2dm");


byte[] postData = postDataBuilder.toString().getBytes("UTF8");


URL url =new URL(HOST);


HttpURLConnection conn = (HttpURLConnection) url.openConnection();


conn.setDoOutput(true);


conn.setUseCaches(false);


conn.setRequestMethod("POST");


conn.setRequestProperty("Content-Type","application/x-www-form-urlencoded");


conn.setRequestProperty("Content-Length",Integer.toString(postData.length));


OutputStream out = conn.getOutputStream();


out.write(postData);


out.close();


BufferedReader in =new BufferedReader(new InputStreamReader(conn.getInputStream()));


String inputLine;


while ((inputLine = in.readLine()) !=null) {


System.out.println(inputLine);


}


}catch (Exception e) {


e.printStackTrace();


}


}

}

Auth_android 닫기

 
 위의 클래스를 실행하게 되면 처음 C2DM에 신청한 ID를 통해 인증을 거치고 사용가능한 키값이 넘어온다. 이 키값역시 위에 기기에 대한 인증키값과 함께 사용하여 메시지를 전달하는 서버에서 사용된다.

여기서 넘어오는 키 값을 편의에 따라 AUTH 라고 하겠다.


-. 서버의 구현


접기

publicclass Push


{


privatestatic StringHOST ="http://android.apis.google.com/c2dm/send"


//해당어플리케이션의인증키


privatestatic StringAUTH ="DQAAAKkAAAA...................................";


//C2DM을사용하겠다고신청한디바이스의인증키


privatestatic String[]arrId =


{


"APA91bF6WBifiEJ0VtG2bxmKBc_EPWVhmB......................................"


};


publicstaticvoid main( String[] args )throws Exception


{


for (int i=0; i<arrId.length i++)


{


//보낼메시지


androidPush(arrId[i],"바보","꺼져");


}


}


publicstaticvoid androidPush(String regId, String title, String msg)throws Exception


{


try


{


StringBuffer postDataBuilder =new StringBuffer();


postDataBuilder.append("registration_id=" + regId);// 등록ID


postDataBuilder.append("&collapse_key=1");


postDataBuilder.append("&delay_while_idle=1");


postDataBuilder.append("&data.title=" + URLEncoder.encode(title,"UTF-8"));// 제목


postDataBuilder.append("&data.msg=" + URLEncoder.encode(msg,"UTF-8"));// 내용


byte[] postData = postDataBuilder.toString().getBytes("UTF8");


URL url =new URL(HOST);


HttpURLConnection conn = (HttpURLConnection) url.openConnection();


conn.setDoOutput(true);


conn.setUseCaches(false);


conn.setRequestMethod("POST");


conn.setRequestProperty("Content-Type","application/x-www-form-urlencoded");


conn.setRequestProperty("Content-Length",Integer.toString(postData.length));


conn.setRequestProperty("Authorization","GoogleLogin auth="+AUTH);


OutputStream out = conn.getOutputStream();


out.write(postData);


out.close();


conn.getInputStream();


}


catch (Exception e)


{


e.printStackTrace();


}


}

}

접기


  이 소스에 대한 필요한 설명은 코드에 함께 추가하였다.
 여기서 AUTH에는 위에서 인증받은 어플리케이션에 대한 인증키값을
 arrId에는 그 위에서 인증받은 기기에 대한 인증키값을 넣어준다.
 
 
 -. 실행순서
  가장 먼저 실행해야 할 것은 어플리케이션의 인증키값을 받아오는 Auth_android 의 실행이다. 이 값으로 얻어진 키값을 서버(Push.java)에 추가한다. 
  그리고 나서 안드로이드 어플리케이션을 실행하여 가입버튼을 누르고 좀 기다리면 서버에서 보내주는 기기 인증키값이 나온다. 이 키값을 서버(Push.java)에 추가한다.
  여기서 주의해야 할 것은 가입버튼을 누를 때마다 다른 키값이 넘어오게 되므로 이 점은 개발할 때 유의해야할 것이다. 
 마지막으로 서버를 실행하게 되면 입력한 메시지가 휴대폰에 뜬다!!!ㅋㅋ 그럼 밑에 스샷을 추가하겠다!!

 -. 스크린샷
  1. 어플리케이션 인증! 


 실행하게 되면 맨 아래 나오게되는 Auth값만 필요하다. 이 키값이 어플리케이션의 키값이 된다.

 2. 디바이스 인증


 가입 버튼을 누르게 되면 아래 로그캣창에 가장 긴 값이 바로 디바이스 인증키이다. 

  3. C2DM 서버에서 클라이언트로 보내기!
 

 가운데 쯤에 있는 //보낼 메시지에 받을 기기의 키값과 타이틀, 내용을 실어서 보낸다~
 그럼 한...2~3초 후에 기기에서 그 메시지를 받아서 보여준다!!
 

 이번에 테스트에서는 다이얼로그를 통해서 표현했지만 여러가지 방법으로 사용이 가능할 것이다.


-. 정리
 이번 테스트에서 얻은 결과로는 아이폰과 똑같은 기능을 하는 Push기능을 안드로이드에서 구현이 가능하다는 것을 알게되었다.
 지금 진행하고 있는 프로젝트에서  제대로 사용하기 위해서는 현재 이 C2DM을 통해서 Push메시지를 받기로 한 디바이스 인증 키값을 서버에서 가지고 있어야 한다는 점이다.  이 부분은 좀더 알아 봐야겠지만 왠지 C2DM 서버를 통해서 얻을 수 있을 것 같다.. 아니면 뭐..;;

 그리고 한번에 하나의 디바이스로 밖에 보낼 수 없기 때문에 반복문을 사용해서 메시지를 전달해야 하며.
 현재는 구글에서 정해진 일정 길이의 텍스트만 전송이 가능하다. 왜냐하면 C2DM 서비스는 대량의 컨텐츠를 푸쉬하게 설계되지 않았고 특정 앱에세 새로운 데이터가 있음을 알려주는 역할만 하도록 설계되었기 때문이다.
 
 또한 푸시메시지를 받기로 신청한 어플리케이션은 현재 작동중이지 않아도 된다 (BroadCastReceiver를 사용했기 때문에)
 그리고 따로 푸시메시지를 해지 하지 않고 해당 어플리케이션을 삭제하여도 푸시메시지는 더 이상 오지않는다.


출처 http://j2enty.tistory.com/entry/Android-Push-NotificationC2DM-Service

출처 : http://stackoverflow.com/posts/5219182/edit

Hi use this code........

public class C2dmEx extends Activity
{
  

static TextView mytext = null;
    Context context = null;
    Intent intent = null;


    @Override
    public void onCreate(Bundle savedInstanceState)
    {
        super.onCreate(savedInstanceState);
        setContentView(R.layout.main);
        
        mytext = (TextView) findViewById(R.id.mytext);  
        mytext.setText("app started");

        
        Intent registrationIntent = new Intent("com.google.android.c2dm.intent.REGISTER");
        registrationIntent.putExtra("app", PendingIntent.getBroadcast(this, 0, new Intent(), 0)); 
        registrationIntent.putExtra("sender","your Mail Id");
        startService(registrationIntent);
        
        mytext.setText("Grabbing your device registration ID.....");
      
        Log.i("Recieve","1");
        
    }
}


public class C2DMReceiver extends  BroadcastReceiver
{
//private CustomerBean customer = null;
private RegisterManager reg = null;
private C2dmEx ex = null;
int UserId = 0;
private boolean auth = false;
private CustLogin cl = null;
public C2DMReceiver()
{
cl = new CustLogin();
}
@Override
public void onReceive(Context context, Intent intent)
   {
       Log.i("Recieve","2");
    C2dmEx.mytext.setText("Intent Received!");
       if (intent.getAction().equals("com.google.android.c2dm.intent.REGISTRATION"))
       {
           handleRegistration(context, intent);
       } 
       else if (intent.getAction().equals("com.google.android.c2dm.intent.RECEIVE")) 
       {
           handleMessage(context, intent);
       }
    }

   private void handleRegistration(Context context, Intent intent)
   {
       
       String registration = intent.getStringExtra("registration_id"); 
       if (intent.getStringExtra("error") != null)
       {
          C2dmEx.mytext.setText("There was an error with your device registration!");
           // Registration failed, should try again later.
       } 
       else if (intent.getStringExtra("unregistered") != null)
       {
           // unregistration done, new messages from the authorized sender will be rejected
          C2dmEx.mytext.setText("You have been unregistered!");
       } 
       else if (registration != null) 
       {
          // Send the registration ID to the 3rd party site that is sending the messages.
          // This should be done in a separate thread.
          // When done, remember that all registration is done.
                         
       // UserId = customer.getId();
       // Log.i("id",String.valueOf(UserId));
       
        String RegId = registration; 
        Log.i("reg",String.valueOf(RegId) );
        C2dmEx.mytext.setText("Your registration code is: " + RegId);


       }
   }
   
   private void handleMessage(Context context, Intent intent)
   {
       C2dmEx.mytext.setText("You have been alerted!");
   }

}

and your manifest

<?xml version="1.0" encoding="utf-8"?>
<manifest xmlns:android="http://schemas.android.com/apk/res/android"
      package="com.mmp.geopon"
      android:versionCode="1" 
      android:versionName="0.1">
      
    <application android:icon="@drawable/icon" android:label="@string/app_name">
    
        <activity android:name=".C2dmEx"
                  android:label="@string/app_name">
            <intent-filter>
                <action android:name="android.intent.action.MAIN" />
                <category android:name="android.intent.category.LAUNCHER" />
            </intent-filter>
        </activity>
        
        <receiver android:name=".C2DMReceiver" android:permission="com.google.android.c2dm.permission.SEND">
       
       <intent-filter>
            <action android:name="com.google.android.c2dm.intent.RECEIVE" />
           <category android:name="com.mmp.geopon" />
        </intent-filter>
        
         <intent-filter>
            <action android:name="com.google.android.c2dm.intent.REGISTRATION" />
            <category android:name="com.mmp.geopon" />
       </intent-filter>
        
   </receiver>
        

    </application>
    
    <uses-sdk android:minSdkVersion="8" />
    <permission android:name="com.mmp.geopon.permission.C2D_MESSAGE" android:protectionLevel="signature" />
     <uses-permission android:name="com.mmp.geopon.permission.C2D_MESSAGE" />
      <uses-permission android:name="com.google.android.c2dm.permission.RECEIVE" />
        <uses-permission android:name="android.permission.INTERNET" />
        <uses-permission android:name="android.permission.READ_PHONE_STATE"/>


</manifest>


출처 : http://www.androidside.com/bbs/board.php?bo_table=B46&wr_id=14705

안녕하세요^^ 리칼입니다.


저도 안드로이드를 하면서 제가 이런글을 올리게 될지 몰랐네요 ㅎㅎ


솔직히 자기의 소스를 공유하면서 강좌 하시는분들을 보면서 정말 대단하다고 생각하였습니다.


자기 시간내기도 힘든데 저렇게 강좌하시는분들이 있기에 안드로이드의 미래가 밝다고 생각합니다.


그래서 조금이나마 저도 보템이 되려고 이렇게 c2dm에 관한 예제를 올리게 되었습니다^^


자! 그럼 시작할께요. 미숙하지만 잘봐주셨으면 감사하겠습니다~


일단 c2dm이 Cloud to Device Messaging 의 약자로 알고 있습니다. 안드로이드 2.2 프로요부터 생겨난


이 API는 개발자들이 서버와 모바일 어플리케이션간에 데이타를 쉽게 싱크할 수 있도록, 서버쪽 에서에서


안드로이드 폰 상의 어플리케이션으로 데이타를 손쉽게 전달할 수 있도록 도와줍니다.


쉽게 생각하시면 아이폰의 푸쉬 기능이라고 보시면 됩니다. 현재 c2dm이 나오기전까진 polling기법을


토하여 실시간 메시징을 했다고 알고있는데 이번 이 api가 추가되면서 일반 서드파티 개발자도 손쉽게


프로그래밍을 개발할수 있으리라 봅니다. 자! 서론이 길었네요 바로 본론으로!


먼저 푸쉬를 사용하기 위해선 구글에 신청을 하여야 합니다. 이게좀 귀찮죠. 신청을 해도 바로 사용할수


있는게 아니라 승인 메일이 와야합니다. 전 일주정도 걸린듯 하네요..미리미리 신청하세요~~


http://code.google.com/intl/ko-KR/android/c2dm/signup.html 이쪽에서 신청하시면 됩니다.


그러면 메일이 invite어쩌고 올겁니다. 그러면 그담부터 사용해도 된다는거죠


제가 만들어 보려는 예제는 메시지를 보내서 실시간으로 다른 폰으로 가게 하는겁니다. 하지만


그럴려면 폰이 2대가 있어야 하는데 대부분 1대밖에 없다는 가정하에 제가 제 자신폰으로 보내게 하도록


구성하였습니다.


간단히 기본 구성원리를 설명해드리겠습니다.


c2dm을 사용하기 위해선 크게 5가지가 필요합니다.


개발자ID(구글계정), 애플리케이션ID(패키지이름정도), 등록ID(특정장치를식별하는 ID),
구글사용자계정(보통핸드폰로그인구글계정),인증토큰값이 필요합니다.


처음에 어플을 실행하여 개발자ID와 어플ID를 c2dm서버에 전송하여 등록ID를 발급 받습니다.
그러면 그 ID가 자기 식별고유ID가 됩니다. 이걸로 상대방 핸드폰을 식별하게 되는거죠.


그담에 메시지를 쓰고 전송을 누르면 먼저 c2dm에 인증을 요청해야 합니다. 아무나 보내면


보안에 문제가 있겠죠? 이때 개발자ID가 필요합니다. 개발자가 c2dm을 신청하였기 때문에


쓸수가 있는거죠~ 그리고 나서 인증을 되면 등록ID,인증토큰값,보낼 메시지등등을 푸쉬에 담아


상대방 핸드폰으로 보내게 됩니다... 여기서 중요한건 저는 지금 제 자신에게 푸쉬를 보내게


만들었습니다. 그러므로 다중 메시지보내기 어플을 만들게 된다면 상대방의 등록ID를 알아야겠죠?


그럴라면 서드파티서버가 필요합니다. 그 서버를 구현하여 디비를 만들고 상대방의 ID를 등록


시켜서 푸쉬를 보내야 할것입니다. 이건 사용자가 직접 구현해야 하는 사항입니다.


대충이렇습니다.


////////////////////////////////////////////////////////////////////////////////////


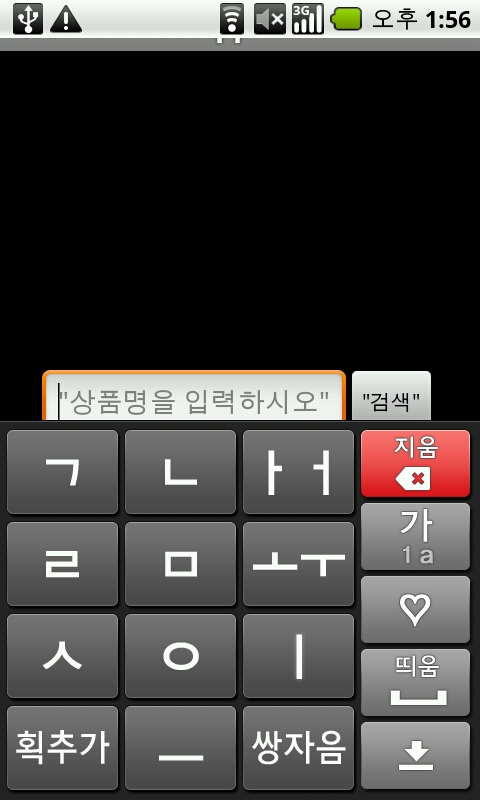
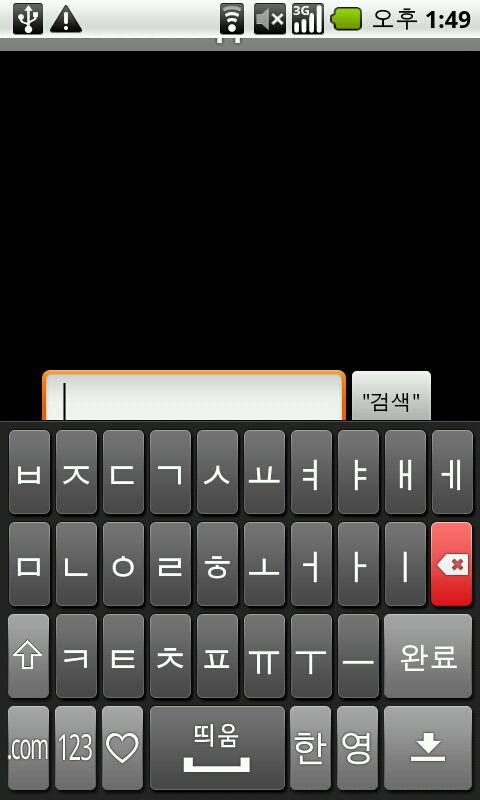
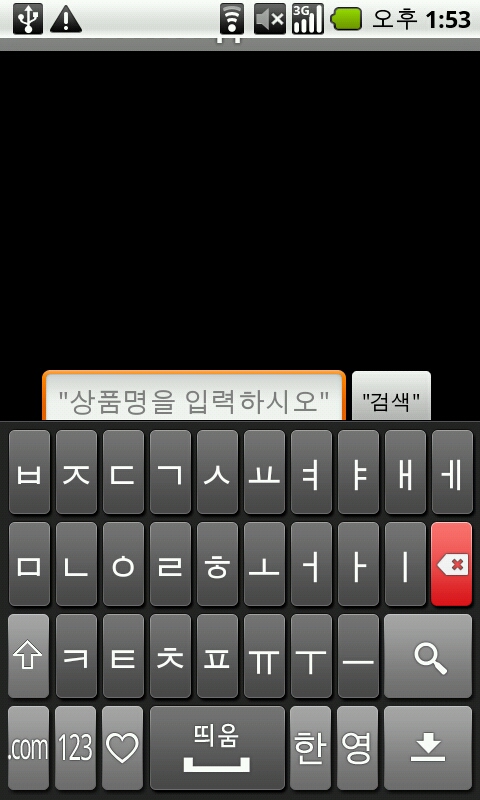
자 이제 c2dm 예제를 시작하겠습니다. 먼저 프로젝트 생성후 대충 저처럼 UI구성하세요.


<?xml version="1.0" encoding="utf-8"?>
<LinearLayout xmlns:android="http://schemas.android.com/apk/res/android"
    android:orientation="horizontal"
    android:layout_width="fill_parent"
    android:layout_height="fill_parent"
    android:background="#ffffff"
    android:gravity="center_vertical"
    >
<TextView 
    android:layout_width="wrap_content"
    android:layout_height="wrap_content"
    android:text="메세지 보내기"
    />
    <EditText
    android:id="@+id/msg_text"
    android:layout_width="180dip"
    android:layout_height="wrap_content"/>
    <Button
    android:id="@+id/msg_send"
    android:layout_width="wrap_content"
    android:layout_height="wrap_content"
    android:text="보내기"/>
</LinearLayout>


그리고 메인 activity 에서 아까 말한것 같이 등록ID를 발급 받아야 합니다.
이렇게 작성하시면 됩니다.


C2dm.java


public class C2dmTest extends Activity {
    /** Called when the activity is first created. */
EditText msg_text;
Button msg_send;
private OutputStream out = null;
    @Override
    public void onCreate(Bundle savedInstanceState) {
        super.onCreate(savedInstanceState);
        setContentView(R.layout.main);
       
//C2DM 등록ID 발급
Intent registrationIntent = new Intent("com.google.android.c2dm.intent.REGISTER");
registrationIntent.putExtra("app", PendingIntent.getBroadcast(this, 0, new Intent(), 0)); // 어플리케이션ID
registrationIntent.putExtra("sender", "xxxxxxxx@gmail.com"); //개발자ID
startService(registrationIntent); //서비스 시작(등록ID발급받기)
                 // 위에서 지정한 "app"와 "sender"은 맘대로 지정하시는게 아니라 구글에서 필요한 변수명들입니다.
       
       
        msg_text = (EditText)findViewById(R.id.msg_text);
        msg_send = (Button)findViewById(R.id.msg_send);
       
        msg_send.setOnClickListener(new OnClickListener() {
@Override
public void onClick(View v) {
// TODO Auto-generated method stub
try {
// 메시지를 보낼때 sender(발급받은 ID, 토큰인증값, 메시지)
sender(C2dm_BroadcastReceiver.registration_id,getAuthToken(),msg_text.getText().toString());
} catch (Exception e) {
// TODO Auto-generated catch block
e.printStackTrace();
}
}
});
    }
   
    public void sender(String regId,String authToken,String msg) throws Exception{
     StringBuffer postDataBuilder = new StringBuffer();
       
     postDataBuilder.append("registration_id="+regId); //등록ID
     postDataBuilder.append("&collapse_key=1");
     postDataBuilder.append("&delay_while_idle=1");
     postDataBuilder.append("&data.msg="+URLEncoder.encode(msg, "UTF-8")); //태울 메시지


        byte[] postData = postDataBuilder.toString().getBytes("UTF8");


        URL url = new URL("https://android.apis.google.com/c2dm/send");
       
        HttpURLConnection conn = (HttpURLConnection) url.openConnection();
        conn.setDoOutput(true);
        conn.setUseCaches(false);
        conn.setRequestMethod("POST");
        conn.setRequestProperty("Content-Type", "application/x-www-form-urlencoded");
        conn.setRequestProperty("Content-Length", Integer.toString(postData.length));
        conn.setRequestProperty("Authorization", "GoogleLogin auth=" + authToken);


        OutputStream out = conn.getOutputStream();
        out.write(postData);
        out.close();


        conn.getInputStream();


    }
   
    public String getAuthToken() throws Exception{
     String authtoken = "";
       
     StringBuffer postDataBuilder = new StringBuffer();
        postDataBuilder.append("accountType=HOSTED_OR_GOOGLE"); //똑같이 써주셔야 합니다.
        postDataBuilder.append("&Email=xxxxxx@gmail.com");  //개발자 구글 id
        postDataBuilder.append("&Passwd=xxxxxx");           //개발자 구글 비빌번호
        postDataBuilder.append("&service=ac2dm");
        postDataBuilder.append("&source=test-1.0");


        byte[] postData = postDataBuilder.toString().getBytes("UTF8");


        URL url = new URL("https://www.google.com/accounts/ClientLogin");
       
        HttpURLConnection conn = (HttpURLConnection) url.openConnection();
        conn.setDoOutput(true);
        conn.setUseCaches(false);
        conn.setRequestMethod("POST");
        conn.setRequestProperty("Content-Type", "application/x-www-form-urlencoded");
        conn.setRequestProperty("Content-Length", Integer.toString(postData.length));


        OutputStream out = conn.getOutputStream();
        out.write(postData);
        out.close();


        BufferedReader br = new BufferedReader(new InputStreamReader(conn.getInputStream()));
       
        String sidLine = br.readLine();
        String lsidLine = br.readLine();
        String authLine = br.readLine();
       
        System.out.println("sidLine----------->>>"+sidLine);
        System.out.println("lsidLine----------->>>"+lsidLine);
        System.out.println("authLine----------->>>"+authLine);
        System.out.println("AuthKey----------->>>"+authLine.substring(5, authLine.length()));
       
        authtoken = authLine.substring(5, authLine.length());
       
     return authtoken;
    }


}


소스를 보시면 대충 아실겁니다. 인증ID와 토큰값을 구해서 메시지만 푸쉬에 태워서 보내는겁니다.


자 여기서 중요한건 저 메시지를 이용하기 위해선 AndroidManifest.xml 등록을 해줘야 하는 부분이 있습니다.


<?xml version="1.0" encoding="utf-8"?>
<manifest xmlns:android="http://schemas.android.com/apk/res/android"
      package="test.android.test"
      android:versionCode="1"
      android:versionName="1.0">
    <application android:icon="@drawable/icon" android:label="@string/app_name">
        <activity android:name=".C2dmTest"
                  android:label="@string/app_name">
            <intent-filter>
                <action android:name="android.intent.action.MAIN" />
                <category android:name="android.intent.category.LAUNCHER" />
            </intent-filter>
        </activity>
<receiver android:name=".C2dm_BroadcastReceiver"
       android:permission="com.google.android.c2dm.permission.SEND">
<intent-filter>
<action android:name="com.google.android.c2dm.intent.RECEIVE"/>
<category android:name="test.android.test"/>
</intent-filter>
<intent-filter>
<action android:name="com.google.android.c2dm.intent.REGISTRATION"/>
<category android:name="test.android.test"/>
</intent-filter>
    </receiver>
    </application>
   
    <permission android:name="test.android.test.permission.C2D_MESSAGE"
     android:protectionLevel="signature"/>
    
    <uses-permission android:name="test.android.test.permission.C2D_MESSAGE"/>
    <uses-permission android:name="com.google.android.c2dm.permission.RECEIVE"/>
    <uses-permission android:name="android.permission.INTERNET"/>
   
    <uses-sdk android:minSdkVersion="8" />


</manifest>


빨간색으로 표시한 부분이 추가한 부분입니다. 퍼피션 부분을 추가하고 자기 패키지에 맞게 설정을


하셔야 보내고 받기를 할수가 있습니다. 그리고 저위에 리시버 부분을 보시면 저부분이 발급ID를 만들기


위해 보내고 메시지를 받고 하는 부분입니다. C2dm_BroadcastReceiver 클래스 파일이 중요한 역할을


하게 되죠.


C2dm_BroadcastReceiver.java


public class C2dm_BroadcastReceiver extends BroadcastReceiver{
    /** Called when the activity is first created. */
static String registration_id = null;
static String c2dm_msg = "";
    @Override
    public void onReceive(Context context, Intent intent) {
     if (intent.getAction().equals("com.google.android.c2dm.intent.REGISTRATION")) {
    
     handleRegistration(context, intent);
    
     } else if (intent.getAction().equals("com.google.android.c2dm.intent.RECEIVE")) {
    
     c2dm_msg = intent.getExtras().getString("msg");
    
     System.out.println("c2dm_msg======>"+c2dm_msg);
     Toast toast = Toast.makeText(context, "메시지 도착!\n"+c2dm_msg, Toast.LENGTH_SHORT );
  toast.setGravity( Gravity.TOP | Gravity.CENTER, 0, 150 );
  toast.show();
    
     }
    }
   
    private void handleRegistration(Context context, Intent intent) {
    
     registration_id = intent.getStringExtra("registration_id");
    
     System.out.println("registration_id====>"+registration_id);
    
     if (intent.getStringExtra("error") != null) {
    
     Log.v("C2DM_REGISTRATION",">>>>>" + "Registration failed, should try again later." + "<<<<<");
    
     } else if (intent.getStringExtra("unregistered") != null) {


     Log.v("C2DM_REGISTRATION",">>>>>" + "unregistration done, new messages from the authorized sender will be rejected" + "<<<<<");
    
     } else if (registration_id != null) {
    
     System.out.println("registration_id complete!!");
     }
    }
   
   
}


바로 이 클래스가 BroadcastReceiver를 상속받아서 통보를 하는 역할을 하게 되죠.


BroadcastReceiver 의 역할은 제 설명보다는 직접 찾아보시는게 좋을듯해요 ㅠㅠ 제가 설명을 잘못해서~


무튼 간단하게 통보 역할을 하신다고 보면 되겠네요~


저위에 보면 BroadcastReceiver를 상속받아  onReceive를 오버라이드 한걸 보실수 있습니다.


C2dmTest activity에서 처음에 등록을 하게되면 이 onReceive를 통해 아이디를 받을수 있습니다.


적절한 if문을 통해 받을수가 있죠


if (intent.getAction().equals("com.google.android.c2dm.intent.REGISTRATION")) {
이부분이 바로 등록ID를 받는 부분입니다. 등록ID를 받게되면 handleRegistration함수에서 id를 제대로 받았는지


검사하게 됩니다. 이제 등록ID를 받으면 준비가 된겁니다. 그리고 이제 메시지를 쓰셔서 보내기를


클릭하시면sender(C2dm_BroadcastReceiver.registration_id,getAuthToken(),msg_text.getText().toString());이 메소드를


통해 인증을 하고 등록값과 메시지를 상대방에게 보내지게 됩니다.


그러면 메시지를 수신하게 되면 또 BroadcastReceiver를 사용하게 됩니다. 아까 메니페스트에서 등록한


리시브가 그역할을 하게 됩니다.


이번엔 else if (intent.getAction().equals("com.google.android.c2dm.intent.RECEIVE")) {
이부분이 받게 되겠죠? 여기서 메시지를 이제 받아야겠죠? 아까 위에서 센드해서 보낼때


postDataBuilder.append("&data.msg="+URLEncoder.encode(msg, "UTF-8")); 이부분을 볼수 있습니다.


메시지 말고 다른 변수도 태워 보내실거면 저밑에 data.xxx로 추가하셔서 보내시면 됩니다.


postDataBuilder.append("&data.phone="+URLEncoder.encode(phone, "UTF-8")); 이렇게 보내시면 됩니다.


그렇게 보낸걸 받을때는 c2dm_msg = intent.getExtras().getString("msg");이렇게만 받으시면 됩니다.


data.xxx 에서 xxx만 꺼내시면 됩니다. 이렇게 하시면 푸쉬를 받게 되실 겁니다.


그리고 아직 c2dm이 정식으로 나온게 아니라 그런지 푸쉬가 잘안올때가 있습니다.


안오게 된다고 걱정마시고 계속 하시다 보면 언젠가 옵니다 ㅋㅋ


저부분에서 응용하시면 될듯하네요 노티를 사용하시거나 진동및 사운드 등등은


여러분의 몫!


휴 쓰다보니 정신없이 쓰게 됐네요 -_-;; 제대로 썻는지도 모르겠습니다..


무튼 저처럼 고생하시는 분없기를 기대하면서.. 저는 이만 


Push Notification on iOS & Android

 출처 : http://ruknabid.blogspot.com/2011/02/push-notification-on-mobile.html

  Apple은 Push Notification을 Apple 내부에 별도의 APNS (Apple Push Notification Service) 서버를 이용하는 방식으로 Push App. 개발을 지원함.

  이를 이용한 개발방법은 아래 블로그를 참조

  애플 아이폰 푸시알림 서비스 (APNS, Apple Push Notification Service)


  Android는 2.2 (Proyo) 버전부터는 APNS와 유사한 C2DM (Android Cloud to Device Messaging Framework) 서버를 제공함.

이에 대한 자세한 내용은 아래 링크를 참조

  Google Projects for Android: C2DM

  하지만, Android 2.1 이하 버전에는 Push Server가 존재하지 않는데, 아래 통계에서 보듯이 2.2 이하 버전의 점유율이 여전히 42%에 육박함.

           [Current Distribution of Android Platform Versions]

        Data collected during two weeks ending on February 2, 2011


  따라서, 2.1이하의 하위 버전에서의 Push Service 구현에 대한 고려가 필요하며, 이를 위한 방안은 아래 링크를 참조함.

  How to Implement Push Notifications for Android

  이를 간략히 요약하면, Polling, SMS Notification, Persistent TCP/IP 방식이 있으며,

  1. Polling은 real-time도 아니고 resource가 많이 필요하다는 문제점이 있고,

  2. SMS Notification은 SMS 발송 비용 문제가 크며,

  3. Persistent TCP/IP는 그나마 나으나, 제대로 구현하기 어렵다는 문제가 있음

  그래서, 위 블로그에서 추천하는 방법은 3번을 제대로 구현한 MQTT를 이용하는 방식임.

  MQTT에 관련된 내용은 아래 링크 참조

  IA92: WBI Brokers - Java implementation of WebSphere MQ Telemetry transport

'Android > Tip&Tech' 카테고리의 다른 글

android c2dm sample source  (1) 2011.04.26
c2dm simple example  (0) 2011.04.25
터치 이벤트 관련 글  (2) 2011.04.22
키패드 올려줄때 입력창 같이 올려주는 팁  (0) 2011.04.22
android 내장메모리에 쓰기  (0) 2011.04.22

 
[출처] http://blog.vizpei.kr/94697746 

어플리케이션 개발을 하다보면 반드시 해야하는 것이 모션 이벤트 처리 입니다.

터치 이벤트 같은 것들은 DOWN - MOVE - UP의 단계를 거치면서

사용자가 어떤 동작을 입력 하는지 감지 할 수 있습니다.

이 입력의 어떤 조합으로 사용자가 어떤 동작을 했는지 감지 할 수 있겠죠.

하지만 직접 이런 제스쳐들을 구현하기란 쉬운 일만은 아닙니다. (무엇보다 귀찮죠~)


그래서 Android에서는 GestureDetector라는 클래스를 아얘 제공합니다.


[About GestureListener]


GestureDetector는 두 가지 Listener를 가지고 있습니다.

interface GestureDetector.OnDoubleTapListener
interface GestureDetector.OnGestureListener

http://developer.android.com/reference/android/view/GestureDetector.html


자세한 설명은 Reference를 보시면 됩니다.

OnDoubleTapListener는 이름 그대로 두번 터치 했을 때,

OnGestureListener는 일반적인 제스쳐들, 한번 터치나 스크롤 관련 Listner입니다.

그리고 저 두 가지 interface를 모두 가진 녀석이 있습니다.

class GestureDetector.SimpleOnGestureListener

보통 SimpleOnGestureListener만 extends 하면 모든 제스쳐를 다 사용 할 수 있습니다.


[Usage of GestureDetector]


사용법도 매우 간단합니다.

GestureDetector를 만들기만 하면 땡이죠.

mGestureDetector = new GestureDetector(this, new SimpleGestureListener());
mGestureDetector.onTouchEvent(event);

음... 너무 뜬금 없는 코드인가요? 일단 아주 간단하게 적어 봤습니다.

1. GestureDetector를 만들 때 GestureListener를 등록 하고

2. 감시할 MotionEvent를 onTouchEvent에 넣어 주면 GetstureListener가 호출이 되는 구조 입니다.


좀 더 자세하게 살펴 보면,

  private final class SimpleGestureListener 
  extends GestureDetector.SimpleOnGestureListener {
      // Implementation
  }

  private GestureDetector mGestureDetector;

  @Override
  public void onCreate(Bundle savedInstanceState) {
      super.onCreate(savedInstanceState);
      setContentView(R.layout.main);
      mGestureDetector = new GestureDetector(thisnewSimpleGestureListener());
  }

  @Override
  public boolean onTouchEvent(MotionEvent event) {
      return mGestureDetector.onTouchEvent(event);
  }

위와 같습니다.


[Analyze Gestures]


사용법은 간단하지만 제스쳐는 그리 간단하지 않습니다.

그래서 각 제스쳐에 대해서 분석을 해봤습니다.

public boolean onDoubleTap(MotionEvent e)
public boolean onDoubleTapEvent(MotionEvent e)
public boolean onDown(MotionEvent e)
public boolean onFling(MotionEvent e1, MotionEvent e2, float vX, float vY)
public void onLongPress(MotionEvent e)
public boolean onScroll(MotionEvent e1, MotionEvent e2, float dX, float dY)
public void onShowPress(MotionEvent e)
public boolean onSingleTapConfirmed(MotionEvent e)
public boolean onSingleTapUp(MotionEvent e)

일단 제스쳐 이벤트에 대해서 간단히 살펴 봅시다.


onDoubleTap은 두 번 터치입니다.

onDoubleTap은 두 번 터치하면 이벤트가 더 이상 발생 되지 않지만,

onDoubleTapEvent는 DOWN, MOVE, UP 이벤트를 모두 포함 합니다. (나중에 살펴 보겠습니다.)


onDown은 터치하려고 손을 대기만 해도 발생되는 이벤트며,

모든 제스쳐의 시작입니다.


onFling은 onScroll에서 끝을 살짝 튕기는 동작에서 발생하는 이벤트며,

onScroll은 말 그대로 스크롤 시에 발생하는 이벤트 입니다.


onLongPress는 길게 눌렀을 때 발생 하는 이벤트며,

onShowPress는 onLongPress보다는 좀 더 짧은 시간동안 누르고 있으면 발생 하는 이벤트 입니다.


onSingleTap은 한 번 터치 했을 때 발생하는 이벤트며,

onSingleTabConfirmed는 한 번 터치 하고 다음에 다시 터치 이벤트가 들어오지 않았을 때,

한 번 터치가 확실 하다고 확인 시켜주는 이벤트 입니다.


자... 이제 시작입니다! 이건 간단히 살펴 본것 밖에 안되는...

본격적으로 실제 제스쳐에 따라서 어떤 이벤트가 호출 되는지 살펴 보겠습니다.

시간은 로그를 통해 한번만 계산된 시간이며,

대략 그 시간 범위에서 이벤트가 발생 한다고 보시면 됩니다.


1. 아주 살짝 터치

000ms    onDown : ACTION_DOWN
060ms    onSingleTapUp : ACTION_UP
306ms    onSingleTapConfirmed : ACTION_DOWN

일단 손을 대면 무조건 onDown 이벤트 발생입니다.

살짝 터치를 하게 되면 보통 30~60ms 정도 후에 손이 떨어지게 됩니다.

손이 떨어 지면 onSingleTapUp 이벤트가 발생하며,

onDown이벤트 발생 후 약 300ms 안에 다시 onDown 이벤트가 발생 하지 않는다면

onSingleTapConfirmed 이벤트가 발생하여 확실히 한 번 터치 되었다는 이벤트를 발생 시킵니다.


2. 살짝 터치

000ms    onDown : ACTION_DOWN
097ms    onShowPress : ACTION_DOWN
172ms    onSingleTapUp : ACTION_UP
303ms    onSingleTapConfirmed : ACTION_DOWN

역시나 onDown 이벤트 부터 시작입니다.

1번 보다는 살짝 길게, 약 90~100ms 정도 터치되면 onShowPress 이벤트가 발생합니다.

172ms 이후에 손을 떼었으며,

역시나 300ms 정도 지나면 onSingleTapConfirmed 이벤트가 발생 됩니다.


3. 약간 길게 터치

000ms    onDown : ACTION_DOWN
103ms    onShowPress : ACTION_DOWN
460ms    onSingleTapUp : ACTION_UP

2번보다 좀 더 길지만, LongPress는 아닌 상황입니다.

역시 이 때도 약 100ms 정도에 onShowPress 이벤트가 발생하긴 하지만

300ms 이후에 손을 떼었기 때문에 onSingleTapConfirmed 이벤트가 먹히는 현상이 일어납니다.


4. 아주 길게 터치

000ms    onDown : ACTION_DOWN
096ms    onShowPress : ACTION_DOWN
590ms    onLongPress : ACTION_DOWN

LongPress가 발생 하는 상황입니다.

100ms 정도에 onShowPress 이벤트가 발생 하며,

약 590~600ms 정도에 onLongPress 이벤트가 발생 합니다.

이때 onSingleTapUp 이벤트는 발생 하지 않습니다.


두 번 터치 하는 경우에는 이벤트가 두 가지이기 때문에,

두 가지 조합의 경우 모두 살펴 보겠습니다.


5. 두 번 터치 (onDoubleTap)

000ms    onDown : ACTION_DOWN
060ms    onSingleTapUp : ACTION_UP
140ms    onDoubleTap : ACTION_DOWN
140ms    onDown : ACTION_DOWN (지연 될 수 있음)

먼저 onSingleTapUp 이벤트가 발생 합니다.

그리고 onSingleTapConfirmed 가 발생 하기 전에

다시 onDown 이벤트가 들어오게 되면 onDoubleTap 이벤트가 발생 합니다.

참고로 두번째 들어오는 onDown 이벤트는 onDoubleTap 이벤트보다 늦게 들어 올 수 있습니다.

(항상 같이 들어 오는게 아니라 onDoubleTap이 먼저 발생 합니다.)


6. 두 번 터치 (onDoubleTapEvent)

000ms    onDown : ACTION_DOWN
041ms    onSingleTapUp : ACTION_UP
130ms    onDoubleTapEvent : ACTION_DOWN
130ms    onDown : ACTION_DOWN (지연 될 수 있음)
190ms    onDoubleTapEvent : ACTION_UP

onDoubleTap 이벤트와의 차이는 DOWN, MOVE, UP 이벤트까지 모두 캐치된다는 점이며,

마지막에 onDoubleTapEvent에 UP 액션이 들어오는 것을 확인 할 수 있습니다.

(위의 경우, 190ms 이후에 두번째 터치에서 손이 떨어졌다는 것을 확인 할 수 있습니다.)


7. 두 번 터치 (onDoubleTap + onDoubleTapEvent)

000ms    onDown : ACTION_DOWN
080ms    onSingleTapUp : ACTION_UP
200ms    onDoubleTap : ACTION_DOWN
200ms    onDoubleTapEvent : ACTION_DOWN (지연 될 수 있음)
200ms    onDown : ACTION_DOWN (지연 될 수 있음)
260ms    onDoubleTapEvent : ACTION_UP

같이 사용 하게 되면 onDoubleTap, onDoubleTapEvent 이벤트 둘 다 발생하며,

항상 onDoubleTap 이벤트가 먼저 발생 하게 됩니다.

(결과적으로 onDoubleTap - onDoubleTapEvent - onDown 순서로 발생 합니다.)


8. 두 번 터치, 두 번째 터치시 스크롤 (onDoubleTapEvent)

000ms    onDown : ACTION_DOWN
080ms    onSingleTapUp : ACTION_UP
179ms    onDoubleTapEvent : ACTION_DOWN
179ms    onDown : ACTION_DOWN (지연 될 수 있음)
280ms    onDoubleTapEvent : ACTION_MOVE
289ms    onShowPress : ACTION_DOWN

290ms    onDoubleTapEvent : ACTION_MOVE
...
779ms    onLongPress : ACTION_DOWN
800ms    onDoubleTapEvent : ACTION_UP

평소에 절대 나올법한 제스쳐지만 onDoubleTapEvent의 특성을 살펴보기 위한 제스쳐 입니다.

두 번째 onDown 이벤트 이후에 MOVE 이벤트가 들어 오는 것을 확인 할 수 있으며,

한가지 특이한 점은 계속 스크롤 되지 않고 onLongPress 이벤트가 발생하면 끝난다는 점입니다.

손을 뗄 수 밖에 없는 상황이 오게 되죠.


위에서 보시다 시피,

조금 길게 눌러짐에 따라 onShowPress와 onLongPress가 도중에 발생 할 수도 있습니다.


9. 스크롤

000ms    onDown : ACTION_DOWN
030ms    onScroll : ACTION_DOWN, ACTION_MOVE
...

스크롤 이벤트는 간단 합니다.

최소 30ms 이후 부터는 onScroll 이벤트가 발생 할 수 있으며,

플링시키지 않고 살며시 손을 떼면 끝까지 onScroll 이벤트만 연속으로 발생 합니다.


10. 플링

000ms    onDown : ACTION_DOWN
030ms    onScroll : ACTION_DOWN, ACTION_MOVE
...
900ms    onFling : ACTION_DOWN, ACTION_UP

마지막에 손가락을 슬며시 튕기는 플링 동작입니다.

스크롤 이벤트와 비슷하지만, 마지막에 UP 액션과 함께 onFling 이벤트가 동작합니다.


스크롤과 플링 제스쳐 모두 시간에 따라 onShowPress 이벤트가 발생 할 수 있습니다.


[Outro]


Android에 기본으로(API Level 1) 들어 있는 GestureDetector에 대해서

조금은 자세하게 알아 봤습니다.

그냥 막연하게 이벤트 이름만 보고서 프로그래밍을 하기 보다는,

정확하게 어떻게 동작이 되는지 확인 하고 프로그래밍을 하면

좀 더 자신이 원하는 제스쳐를 캐치하여 좀 더 나이스한 어플리케이션을 만들 수 있을 것입니다.


엄청나게 강력하게 보이는 GestureDetector지만,

여기에도 한가지 단점이 있답니다.


다음에는 이 단점을 극복 할 수 있는 클래스를 만들어 보도록 하겠습니다.

'Android > Tip&Tech' 카테고리의 다른 글

c2dm simple example  (0) 2011.04.25
Push Notification on iOS & Android  (0) 2011.04.25
키패드 올려줄때 입력창 같이 올려주는 팁  (0) 2011.04.22
android 내장메모리에 쓰기  (0) 2011.04.22
마켓 등록 정보  (0) 2011.04.20


출처 : http://devbible.tistory.com/17
EditText 를 클릭 할 때 키패드는 자동으로 올라오게된다.
이때 키패드가 화면을 가려 입력시 불편을 줄 수있다.

*XML

1   <scrollview android:layout_width="fill_parent" android:layout_height="fill_parent">
2  
3 </scrollview>


//위에처럼 스크롤뷰로 감싸주면 키패드가 올라올때 스크롤이생겨서 사용자가 가려있는 뷰들을
//볼 수는 있지만..  사용자가 스크롤을 해주어야 해서 불편하다.

*Source
myEditText : 사용자가 입력하려는 EditText
myScrollView : 스크롤뷰
100 : 딜레이
0, 800 : 스크롤을 부드럽게 롤업하는 위치

01 myEditText.setOnFocusChangeListener(new OnFocusChangeListener(){
02  @Override
03  public void onFocusChange(View v, boolean hasFocus) {
04   if( hasFocus == true ){
05     
06    myScrollView.postDelayed( new Runnable(){
07  
08     @Override
09     public void run() {
10      myScrollView.smoothScrollBy(0800);
11     }
12      
13    }, 100);    
14  
15   }
16  }
17  });


// 위에처럼 EditText에 포커스가 갈때 스크롤이 되게 이벤트를 주면
// 사용자가 스크롤 하지않아도 시원하게 화면이 보이게된다

+ Recent posts