
오늘도 공부
[퍼옴]기본 리니어 레이아웃 정렬 방식 본문
[출처] http://cafe.naver.com/ccjmaster.cafe?iframe_url=/ArticleRead.nhn%3Farticleid=168
<리니어 레이아웃>
방향 설정
차일드 뷰를 일렬로 배치하는 레이아웃이다.
부모 뷰는 화면 전체, 차일드 뷰는 화면 하나하나를 구성하는 요소라고 보면 된다.
...
리니어의 가장 중요한 속성은 배치 방향을 결정하는 orientation이다.
차일드를 배치하는 방법은 수평(horizontal)·수직(vertical) 2가지가 있다.
별도로 지정하지 않으면, default 속성은 수평(horizontal)이 적용된다.
<Button&Edit>
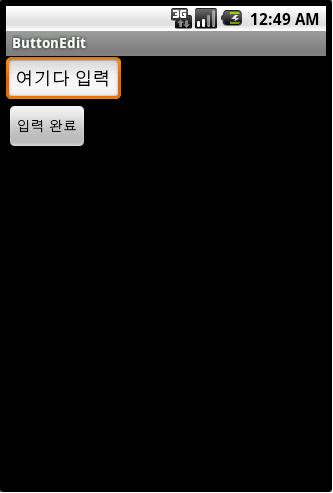
앞서 우리가 했던 Button&Edit 에제에서
orientation 속성만 vertical에서 horizontal로 바꾸어보자.
Layout/Buttonedit.xml
<?xml version="1.0" encoding="utf-8"?>
<LinearLayout xmlns:android="http://schemas.android.com/apk/res/android"
android:orientation="vertical" // horizontal로 바꾸어보자.
android:layout_width="fill_parent"
android:layout_height="fill_parent"
>
<EditText
android:layout_width="wrap_content"
android:layout_height="wrap_content"
android:id="@+id/edit"
android:text="여기다 입력"
/>
<Button
android:layout_width="wrap_content"
android:layout_height="wrap_content"
android:id="@+id/btn"
android:text="입력 완료"
/>
</LinearLayout>
기존의 verticla이었던 Button&Edit 예제 horizontal로 수정한 예제

<TextView>
기존의 했던 TextVeiw도 해보도록 하자.
<?xml version="1.0" encoding="utf-8"?>
<LinearLayout xmlns:android="http://schemas.android.com/apk/res/android"
android:orientation="vertical" // 마찬가지로 horizontal로 해본다.
android:layout_width="fill_parent"
android:layout_height="fill_parent"
>
<TextView
android:layout_width="fill_parent"
android:layout_height="wrap_content"
android:text="@string/insa"
android:textColor="#ff0000"
android:textSize="20pt"
android:textStyle="italic"
/>
<TextView
android:layout_width="fill_parent"
android:layout_height="wrap_content"
android:text="@string/anyoung"
android:textSize="20sp"
android:textColor="#0000ff"
/>
<TextView
android:layout_width="fill_parent"
android:layout_height="wrap_content"
android:text="Good Morning"
android:textColor="#8000ff00"
android:textSize="5mm"
android:typeface="serif"
/>
</LinearLayout>
그리고 실행해보면 Hello 텍스트 하나만 나오고, 두 문자열을 화면에서 사라져 버렸다.
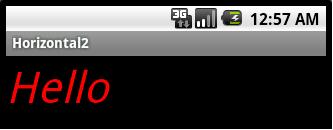
왜냐하면 텍스트 뷰의 layout_width 속성이 fill_parent로 되어 있어 부모의 폭 전체를 다 차지하기 때문이다.
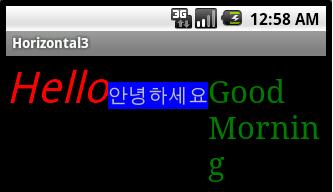
셋 모두 보이게 하려면, 텍스트 뷰의 layout_width의 속성을 wrap_content로 바꿔 자신의 폭만큼 차지하도록 수정해야 한다.
<?xml version="1.0" encoding="utf-8"?> // xml 문서에서는 주석이 통하지 않으므로 복사 후 제거하고 실행한다.
<LinearLayout xmlns:android="http://schemas.android.com/apk/res/android"
android:orientation="vertical"
android:layout_width="fill_parent"
android:layout_height="fill_parent"
>
<TextView
android:layout_width="wrap_content"
android:layout_height="wrap_content"
android:text="@string/insa"
android:textColor="#ff0000"
android:textSize="20pt"
android:textStyle="italic"
/>
<TextView
android:layout_width="wrap_content"
android:layout_height="wrap_content"
android:text="@string/anyoung"
android:textSize="20sp"
android:textColor="#0000ff"
/>
<TextView
android:layout_width="wrap_content"
android:layout_height="wrap_content"
android:text="Good Morning"
android:textColor="#8000ff00"
android:textSize="5mm"
android:typeface="serif"
/>
</LinearLayout>
바꾸고 실행해보면 이렇게 나온다.
-----------
정렬지정
뷰의 영역이 충분히 크면 상하좌우에 넓은 여백이 생긴다.
하지만 뷰가 커진다고 해서 내용물도 같이 커지는 것은 아니며, 이때 내용물을 뷰의 어느 쪽에 배치할 것인지의 문제가 생긴다.
...
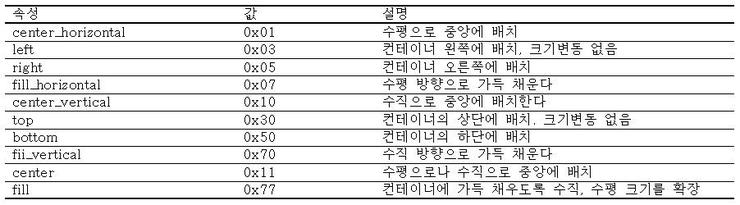
내용물을 뷰의 어느 쪽에 배치할 것인가는 gravity 속성으로 지정한다. 즉, 내용물의 정렬 방식은 gravity로 통제한다.
수평, 수직 방향에 대해 각각 정렬 방식을 지정할 수 있으며 '|' 연산자로 두 개의 속성을 묶어서 지정할 수도 있다.
두 속성을 같이 지정할 때는 '|' 연산자 양쪽으로 공백이 전혀 없어야 한다.
...
각 정렬은 비트 필드로 정의 되어 있으며
contet와 fill은 수평, 수직 정렬 상태 플래그의 조합으로 정의되어 있다.
이 속성을 테스트하기 위해 예제를 만들어보자.
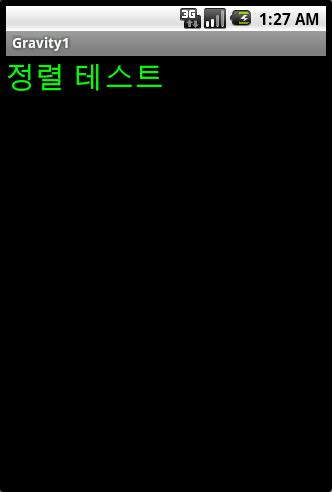
리니어 레이아웃 안에 폭과 높이를 둘 다 fill_parent로 지정했다.
리니어 전체를 텍스트 뷰로 가득 채웠으므로, 텍스트 뷰의 넓이는 화면 전체와 같으며 여백이 굉장히 많은 상황이다.
Layout/gravity1.xml
<?xml version="1.0" encoding="utf-8"?>
<LinearLayout xmlns:android="http://schemas.android.com/apk/res/android"
android:orientation="vertical"
android:layout_width="fill_parent"
android:layout_height="fill_parent"
>
<TextView
android:layout_width="fill_parent"
android:layout_height="fill_parent"
android:text="정렬 테스트"
android:textSize="30px"
android:textColor="#00ff00"
/>
</LinearLayout>
gravity 속성을 따로 지정하지 않았으므로, 디폴트인 좌상단이 적용되며 문자열이 텍스트 뷰의 왼쪽 위에 출력된다.
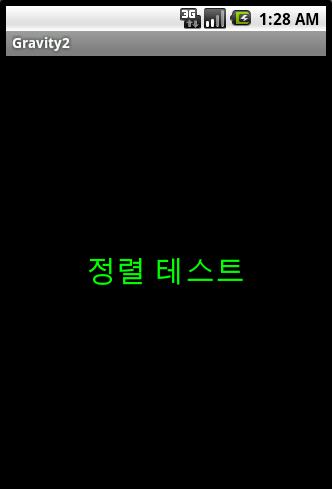
다음과 같이 gravity 속성을 center로 지정해 보자.
Layout/gravity2.xml
<?xml version="1.0" encoding="utf-8"?>
<LinearLayout xmlns:android="http://schemas.android.com/apk/res/android"
android:orientation="vertical"
android:layout_width="fill_parent"
android:layout_height="fill_parent"
>
<TextView
android:layout_width="fill_parent"
android:layout_height="fill_parent"
android:text="정렬 테스트"
android:textSize="30px"
android:textColor="#00ff00"
android:gravity="center"
/>
</LinearLayout>
실행해보면 center는 center_horizontal|center_vertical과 같음을 알 수 있다.
수평, 수직, 모두 중앙이므로 문자열이 텍스트 뷰의 정중앙에 나타날 것이다.
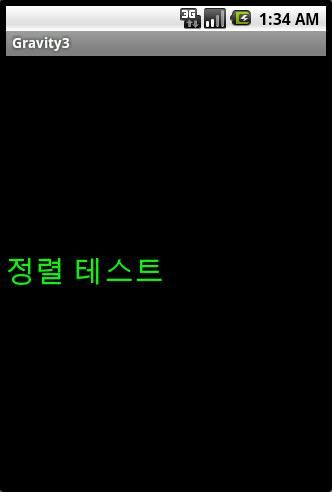
수평, 수직 각각에 대해 다른 정렬 방향을 지정할 수도 있다. 이번에는 다음과 같이 바꿔보자.
Layout/gravity3.xml
<?xml version="1.0" encoding="utf-8"?>
<LinearLayout xmlns:android="http://schemas.android.com/apk/res/android"
android:orientation="vertical"
android:layout_width="fill_parent"
android:layout_height="fill_parent"
>
<TextView
android:layout_width="fill_parent"
android:layout_height="fill_parent"
android:text="정렬 테스트"
android:textSize="30px"
android:textColor="#00ff00"
android:gravity="center_vertical"
/>
</LinearLayout>
Layout/gravity4.xml
<?xml version="1.0" encoding="utf-8"?>
<LinearLayout xmlns:android="http://schemas.android.com/apk/res/android"
android:orientation="vertical"
android:layout_width="fill_parent"
android:layout_height="fill_parent"
>
<TextView
android:layout_width="fill_parent"
android:layout_height="fill_parent"
android:text="정렬 테스트"
android:textSize="30px"
android:textColor="#00ff00"
android:gravity="center_vertical|right"
/>
</LinearLayout>
center_vertical을 지정하면 수직으로는 중앙이 되고, 수평쪽으로는 디폴트인 왼쪽이 적용되어 중앙 왼쪽에 문자열이 나타난다.
물론 '|' 연산자로 묶어 별도의 정렬 방식을 지정할 수 있다. 수직으로는 중앙, 오른쪽에 정렬하면 오른쪽에 붙는다.
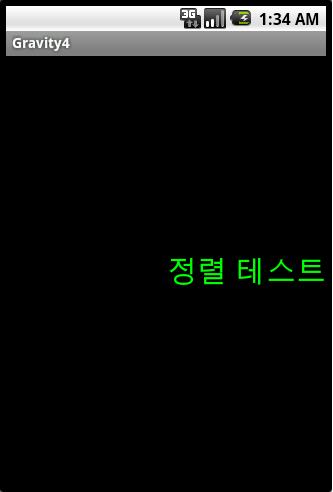
문자열을 오른쪽 바닥에 정렬하려면 "bottom|right"으로 지정하면 되고, 상단 중앙은 "center_horizontal|top"으로 지정하면 된다.
그렇다고 아무 조합이나 다 되는 것은 아니고, 수평·수직 한 방향에 대해 플래그 하나씩 2개만 조합이 가능하다.
gravity 속성 하나만 놓고 보면 어렵지 않을 것이다.
...
그런데 gravity와 유사한 속성으로 layout_gravity 라는 속성이 또 있다.
사용할 수 있는 속성 값은 gravity와 동일하나, 적용되는 대상이 다르다.
· gravity : 뷰 안의 내용물을 어디에 배치할 것인가?
· layout_gravity : 뷰를 부모의 어디에 둘 것인가?
방금 전에 했던 gravity2의 예제와 비교를 한다면, 이해가 빠를 것이다.
Layout/gravity2 // 텍스트 뷰를 리니어에 가득 채우고, 내용물을 center에 옮긴다.
<?xml version="1.0" encoding="utf-8"?>
<LinearLayout xmlns:android="http://schemas.android.com/apk/res/android"
android:orientation="vertical"
android:layout_width="fill_parent"
android:layout_height="fill_parent"
>
<TextView
android:layout_width="fill_parent"
android:layout_height="fill_parent"
android:text="정렬 테스트"
android:textSize="30px"
android:textColor="#00ff00"
android:gravity="center"
/>
</LinearLayout>
Layout/layout_gravity2 // 텍스트 뷰를 문자열 크기로 설정하고, 텍스트 뷰 자체를 리니어의 중아에 배치한다.
<?xml version="1.0" encoding="utf-8"?>
<LinearLayout xmlns:android="http://schemas.android.com/apk/res/android"
android:orientation="vertical"
android:layout_width="fill_parent"
android:layout_height="fill_parent"
android:gravity="center"
>
<TextView
android:layout_width="wrap_content"
android:layout_height="wrap_content"
android:text="정렬 테스트"
android:textSize="30px"
android:textColor="#00ff00"
android:background="#ff0000"
/>
</LinearLayout>

분명 같은 그림이지만, 내용은 다르다.
두 방법은 분명한 차이가 있는데, 리니어의 gravity의 속성을 사용하면
두 개 이상의 차일드 뷰를 묶어서 원하는 곳에 배치할 수 있다는 점이다.
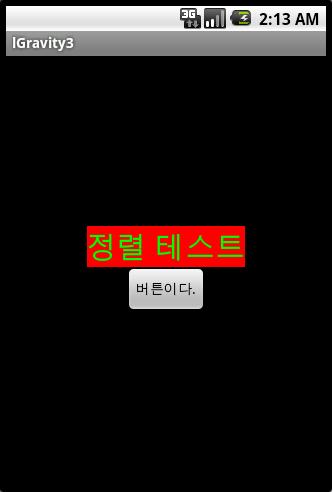
Layout/lgravity3.xml
<?xml version="1.0" encoding="utf-8"?>
<LinearLayout xmlns:android="http://schemas.android.com/apk/res/android"
android:orientation="vertical"
android:layout_width="fill_parent"
android:layout_height="fill_parent"
android:gravity="center"
>
<TextView
android:layout_width="wrap_content"
android:layout_height="wrap_content"
android:text="정렬 테스트"
android:textSize="30px"
android:textColor="#00ff00"
android:background="#ff0000"
/>
<Button
android:layout_width="wrap_content"
android:layout_height="wrap_content"
android:text="버튼이다."
/>
</LinearLayout>
두 차일드 뷰가 중앙에 수직으로 나란히 배치되며 겹치지도 않는다.
두 차일드의 집합이 리니어의 입장에서 볼 때는 내용물이며, 따라서 center 속성이 적용되어 중앙에 온다.
차일드 집합 내부에서는 수직 리니어의 배치 규칙에 따라, 두 위젯이 수직으로 나란히 놓인다.
gravity는 내용물의 정렬 상태를 지정하며, layout_gravity는 뷰 자체의 정렬 상태를 지정한다.
다음 예를 보면 이 두 속성의 차이점과 적절한 활용처를 분명히 알 수 있을 것이다.
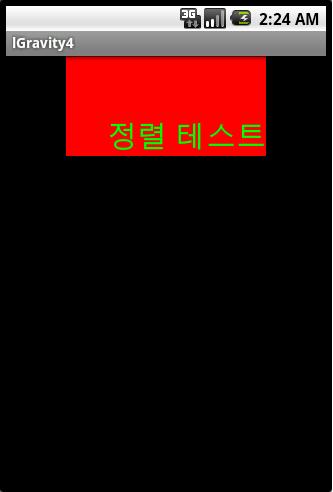
Layout/lgravity4.xml
<?xml version="1.0" encoding="utf-8"?>
<LinearLayout xmlns:android="http://schemas.android.com/apk/res/android"
android:orientation="vertical"
android:layout_width="fill_parent"
android:layout_height="fill_parent"
>
<TextView
android:layout_width="200px"
android:layout_height="100px"
android:text="정렬 테스트"
android:textSize="30px"
android:textColor="#00ff00"
android:background="#ff0000"
android:layout_gravity="center_horizontal"
android:gravity="right|bottom"
/>
</LinearLayout>
layout_gravity는 차일드 뷰를 정렬하므로, 수평으로 중앙에 놓았다.
gravity는 내용을 정렬하므로, 차일드 뷰의 오른쪽 아래에 놓았다.
알고보니 차~암 쉽죠?
'Android > Tip&Tech' 카테고리의 다른 글
| [펌]안드로이드 개발 팁 및 소스 링크 (0) | 2010.12.02 |
|---|---|
| Handling Screen On or Off intent (0) | 2010.12.02 |
| [안드로이드]화면전환 에니메이션 설정 (0) | 2010.12.01 |
| [펌]안드로이드 전체 전역변수 사용하기 (0) | 2010.12.01 |
| intent 객체 직렬화 해서 보내기(Bundle이용 포함) (0) | 2010.11.30 |