출처 : http://withwani.tistory.com/160
Android의 ListView에서 HeaderView와 FooterView를 사용하는 것은 이전 포스트에서 정리를 하였다. 이번 포스트에서는 Thread를 사용하여 HeaderView와 FooterView를 실행했을 때 List item을 갱신 또는 추가 하는 부분을 해볼까 한다. 코드 구현 시 비교 대상은 Twitter Client로 이야기 목록에서의HeaderView와 FooterView을 흉내 내어 볼 것이다.
우선 Header와 Footer를 구현 할 Activity와 xml layout 파일을 구현해 보자.
접기
MoreListThreadExample.java
public class MoreListThreadExample extends Activity {
public static final int INC_COUNT = 15; // 추가로 보여줄 item 개수
MoreItemAdapter adtMore;
ListView lvMore;
View footer, header;
ArrayList<String> datas = new ArrayList<String>();
boolean justOnce = true, isHeader = false;
int footerId, headerId;
@Override
public void onCreate(Bundle savedInstancestate) {
super.onCreate(savedInstancestate);
setContentView(R.layout.ui_listview2);
System.out.println("Entered onCreate()");
lvMore = (ListView)findViewById(R.id.lv_morelist);
footer = getLayoutInflater().inflate(R.layout.ui_sub_footer, null, false);
header = getLayoutInflater().inflate(R.layout.ui_sub_header, null, false);
getData();
}
/* (non-Javadoc)
* @see android.app.Activity#onResume()
*/
@Override
protected void onResume() {
System.out.println("Entered onResume()");
adtMore = new MoreItemAdapter(this, R.layout.ui_sub_list, datas);
lvMore.addFooterView(footer);
lvMore.addHeaderView(header);
lvMore.setAdapter(adtMore);
lvMore.setSelection(lvMore.getHeaderViewsCount());
lvMore.setScrollbarFadingEnabled(true);
headerId = 0;
footerId = lvMore.getHeaderViewsCount()+datas.size();
justOnce = false;
super.onResume();
}
}
접기
접기
ui_listview2.xml
<?xml version="1.0" encoding="utf-8"?>
<LinearLayout xmlns:android="http://schemas.android.com/apk/res/android"
android:layout_width="fill_parent"
android:layout_height="fill_parent"
>
<ListView
android:id="@+id/lv_morelist"
android:layout_width="fill_parent"
android:layout_height="fill_parent"
/>
</LinearLayout>
접기
접기
ui_sub_footer.xml
<?xml version="1.0" encoding="utf-8"?>
<LinearLayout
xmlns:android="http://schemas.android.com/apk/res/android"
android:layout_width="fill_parent"
android:layout_height="wrap_content"
android:gravity="center"
>
<ImageView
android:id="@+id/iv_list_footer_loading"
android:layout_width="wrap_content"
android:layout_height="wrap_content"
/>
<TextView
android:id="@+id/tv_list_footer"
android:layout_width="wrap_content"
android:layout_height="50dip"
android:layout_marginLeft="10dip"
android:gravity="center"
android:text="More item ..."
android:textAppearance="?android:attr/textAppearanceLarge"
/>
</LinearLayout>
접기
접기
ui_sub_header.xml
<?xml version="1.0" encoding="utf-8"?>
<LinearLayout
xmlns:android="http://schemas.android.com/apk/res/android"
android:layout_width="fill_parent"
android:layout_height="wrap_content"
android:gravity="center"
>
<ImageView
android:id="@+id/iv_list_header_loading"
android:layout_width="wrap_content"
android:layout_height="wrap_content"
/>
<TextView
android:id="@+id/tv_list_header"
android:layout_width="wrap_content"
android:layout_height="50dip"
android:layout_marginLeft="10dip"
android:gravity="center"
android:text="Refresh ..."
android:textAppearance="?android:attr/textAppearanceLarge"
/>
</LinearLayout>
접기
사용된 변수 중 justOnce flag는 onScroll() event에서 Header및 Footer에 한 번 이상 접근하는 것을 막기 위해 사용한 flag 변수이다.
ListView에 item을 보여줄 Adapter는 Android 내장 adapter를 사용하지 않고 ArrayAdapter를 extends 해서 새로 구현하였다. 이유는 후에 item을 추가하기 위해 adapter에 add() method를 사용해야 하는데 왜인지 ListActivity를 사용하거나 Android 내장 adapter를 사용하니 add() method를 사용할 수 없었다. 뭐… 무슨 이유가 있겠지… ^^라고 생각하며 시간 관계상 그냥 만들어서 사용해버렸다.
접기
class MoreItemAdapter extends ArrayAdapter<String> {
Context ctx;
List<String> mDatas;
int resId;
public MoreItemAdapter(Context context, int textViewResourceId, List<String> items) {
super(context, textViewResourceId, items);
ctx = context;
mDatas = items;
resId = textViewResourceId;
}
/* (non-Javadoc)
* @see android.widget.ArrayAdapter#getView(int, android.view.View, android.view.ViewGroup)
*/
@Override
public View getView(int position, View convertView, ViewGroup parent) {
View row = convertView;
TextView holder;
if(row == null) {
LayoutInflater inflator = (LayoutInflater)ctx.getSystemService(Context.LAYOUT_INFLATER_SERVICE);
row = inflator.inflate(resId, null);
holder = (TextView)row.findViewById(R.id.tv_list_item);
row.setTag(holder);
} else {
holder = (TextView)row.getTag();
}
final String str = mDatas.get(position);
if(str != null) {
holder.setText(str);
}
return row;
}
}
접기
Adapter는 간단하게 inner class로 만들었으며 생성자의 인수 값으로 Context와 Sub View의 resourceID, 그리고 String형 배열 item을 받아 들인다. String 형 배열 item은 mString으로 테스트를 위해 만들어서 사용하였다.
그 다음으로 ListView adpter와 item 집합인 datas를 갱신하고 추가하는데 사용하는 몇 가지 method와 item을 load할 때 사용할 Thread로 AsyncTask를 만들어 보도록 한다.
우선 method를 구현해 보도록 하자.
접기
getData() method : Footer를 선택하면 현재 item의 수에 추가로 item을 더하는 method. 여기서는 onCreate() method에서 한 번만 실행하게 함.
private void getData() {
System.out.println("Entered getDatas()");
/// Method 1. 추가 개수만큼 처음부터 다시 가져와서 보여주기
int cnt = (datas.isEmpty()) ? 0 : datas.size();
if(cnt != 0) datas.clear();
cnt = cnt + INC_COUNT;
for(int i=0; i<cnt; i++) {
if(i < mStrings.length)
datas.add(mStrings[i]);
}
}
접기
접기
resetList() method : 새로운 adapter를 생성 및 추가 후 ListView의 selection을 1로 설정하면서 Header를 숨기게 함.
private void resetList() {
System.out.println("Entered resetList()");
adtMore = new MoreItemAdapter(this, R.layout.ui_sub_list, datas);
lvMore.setAdapter(adtMore);
lvMore.setSelection(lvMore.getHeaderViewsCount());
footerId = lvMore.getHeaderViewsCount()+datas.size();
}
접기
접기
refreshList() method : Adapter를 갱신하고 onClick() 혹은 onScroll event를 위해 footerId를 설정함. footerId는 list item의 개수에 HeaderView의 개수를 더한 값이다. ListView의 item postion은 0부터 시작하기 때문에 header가 존재하면 header가 0이 되고 footer는 위의 계산 값이 된다.
private void refreshList() {
System.out.println("Entered refreshList()");
adtMore.notifyDataSetChanged();
footerId = lvMore.getHeaderViewsCount()+datas.size();
}
접기
접기
LongProgress AsyncTask : Header와 Footer로 onClick 또는 onScroll event로 접근했을 때 ListView의 item을 추가 혹은 갱신할 때 사용하는 Thread. 주석 중에 Method1은 ProgressDialog를 사용하는 방법이고 Method2는 AnimationDrawable를 header 및 footer에 추가하는 방법이다. Twitter는 Method2를 사용하고 있기 때문에 그 방법을 채택하기로 한다.
class LongProgress extends AsyncTask<Void, Void, Void> {
ProgressDialog dialog = new ProgressDialog(MoreListThreadExample.this);
int cnt, start, end;
String view;
ArrayList<String> temp;
public LongProgress(String viewName) {
super();
view = viewName;
}
/* (non-Javadoc)
* @see android.os.AsyncTask#onPreExecute()
*/
@Override
protected void onPreExecute() {
/// Method 1. ProgressDialog 사용
// dialog.setMessage("Loading data...");
// dialog.show();
/// Method 2. View에 Spin animation 사용
if(view == "header") {
System.out.println("Header spin animation start.");
headerSpinAnim.start();
} else if(view == "footer") {
System.out.println("Footer spin animation start.");
footerSpinAnim.start();
}
temp = new ArrayList<String>();
super.onPreExecute();
}
@Override
protected Void doInBackground(Void... params) {
synchronized (datas) {
/// Method 2. 추가 개수만큼 adapter에 붙여 넣기.
cnt = (datas.isEmpty()) ? 0 : datas.size();
System.out.println("previous datas count = "+datas.size());
if (view == "header") { /// Header 쪽으로 스크롤링 했을 때... 아이템 및 리스트 재설정
start = 0;
end = cnt;
} else if(view == "footer") { /// Footer 쪽으로 스크롤링 했을 때... 아이템 추가 및 리스트 갱신
start = cnt;
end = cnt + INC_COUNT;
}
System.out.println("Start = "+start+", end = "+end);
for(int i=start; i<end; i++) {
try {
Thread.sleep(50);
} catch (InterruptedException e) {
e.printStackTrace();
}
temp.add(mStrings[i]);
}
}
return null;
}
/* (non-Javadoc)
* @see android.os.AsyncTask#onPostExecute(java.lang.Object)
*/
@Override
protected void onPostExecute(Void result) {
System.out.println("Enterd onPostExecute()! result = "+result+", temp size = "+temp.size());
if (view == "header") { /// Header 쪽으로 스크롤링 했을 때... 아이템 및 리스트 재설정
System.out.println("Viewing Header...Called resetList()");
datas = null;
datas = temp;
resetList();
} else if(view == "footer") { /// Footer 쪽으로 스크롤링 했을 때... 아이템 추가 및 리스트 갱신
System.out.println("Viewing Footer...Called refreshList()");
if(!temp.isEmpty()) {
for(int i=0; i<temp.size(); i++) {
adtMore.add(temp.get(i));
// datas.add(temp.get(i)); /// adapter 에 추가하면 자동적으로 늘어남. 즉, 중복 추가라서 삭제함.
}
}
refreshList();
}
System.out.println("result datas count = "+datas.size()+", adtMore size = "+adtMore.getCount());
/// Method 1. ProgressDialog 사용
// dialog.dismiss();
/// Method 2. View에 Spin animation 사용
if(view == "header") {
System.out.println("Header spin animation stop.");
headerSpinAnim.stop();
} else if(view == "footer") {
System.out.println("Footer spin animation stop.");
footerSpinAnim.stop();
}
justOnce = false;
super.onPostExecute(result);
}
}
접기
접기
loadData() method : Header와 Footer에 접근하여 event가 발생했을 때 AsyncTask를 실행하여 item을 추가 및 갱신 시킬 때 사용하는 method.
private void loadData(String who) {
System.out.println("Entered loadData(), who = "+who);
new LongProgress(who).execute();
}
접기
접기
OnItemClickListener : 만약 Header와 Footer를 onClick() event를 이용해서 동작시킬 때 사용. 여기서는 사용하지 않는다.
OnItemClickListener mClickListener = new OnItemClickListener() {
@Override
public void onItemClick(AdapterView<?> parent, View view, int position, long id) {
System.out.println("position = "+position+", datas.size() = "+datas.size());
if(position == footerId) {
if(!justOnce) {
System.out.println("Last position!!!!!!!!!!!!!!!!!!!!!!!!!!!!!!!!!!!!!!!!!!");
justOnce = true;
loadData("footer");
}
} else if(position == headerId) {
if(!justOnce) {
System.out.println("First position!!!!!!!!!!!!!!!!!!!!!!!!!!!!!!!!!!!!!!!!!!");
justOnce = true;
loadData("header");
}
}
}
};
접기
접기
OnScrollListener : ListView에서 onScroll() event를 통해 Header와 Footer를 동작시키기 위해 필요한 listener.
OnScrollListener mOnScrollListener = new OnScrollListener() {
@Override
public void onScrollStateChanged(AbsListView view, int scrollState) {
// TODO Auto-generated method stub
}
@Override
public void onScroll(AbsListView view, int firstVisibleItem, int visibleItemCount, int totalItemCount) {
// System.out.println("first : "+firstVisibleItem+" items : "+visibleItemCount+" last : "+totalItemCount);
if((firstVisibleItem+visibleItemCount) == totalItemCount){ /// footer
if(!justOnce) {
System.out.println("Last position!!!!!!!!!!!!!!!!!!!!!!!!!!!!!!!!!!!!!!!!!!");
justOnce = true;
loadData("footer");
}
} else if((firstVisibleItem == 0)) { /// header
if(!justOnce) {
System.out.println("First position!!!!!!!!!!!!!!!!!!!!!!!!!!!!!!!!!!!!!!!!!!");
justOnce = true;
isHeader = true;
// loadData("header"); // Touch event에서 손을 떼었을 때 이벤트 발생하게끔 onTouch로 넘김
}
} else {
// justOnce = false;
isHeader = false;
}
}
};
접기
접기
OnTouchListener : Twitter를 흉내내기 위해 Header에서 onScroll() event에서 Thread를 발생시키지 않고 onScroll() event 체크 후 onTouch() event에서 ACTION_UP 시에(Touch 후 손을 떼었을 때) 발생시키기 위해 추가한 listener.
OnTouchListener mOnTouchListener = new OnTouchListener() {
@Override
public boolean onTouch(View v, MotionEvent event) {
if(event.getAction() == MotionEvent.ACTION_UP) {
if(isHeader) {
System.out.println("onTouch() entered! event : "+event);
loadData("header");
isHeader = false;
}
}
return false;
}
};
접기
자, 준비가 거의 끝났기 때문에 추가로 해줘야 할 일 몇 개만 하면 실행이 가능하다. 새로 생성한 method를 onResume() method에 적용하고 spin animation을 사용하기 위해 animation xml 파일을 만들고 onCreate() method에 적용하자.
접기
@Override
protected void onResume() {
System.out.println("Entered onResume()");
adtMore = new MoreItemAdapter(this, R.layout.ui_sub_list, datas);
lvMore.addFooterView(footer);
lvMore.addHeaderView(header);
lvMore.setAdapter(adtMore);
lvMore.setSelection(lvMore.getHeaderViewsCount());
lvMore.setScrollbarFadingEnabled(true);
// lvMore.setOnItemClickListener(mClickListener); // Concept에 따라 사용 안함.
lvMore.setOnScrollListener(mOnScrollListener);
lvMore.setOnTouchListener(mOnTouchListener);
headerId = 0;
footerId = lvMore.getHeaderViewsCount()+datas.size();
justOnce = false;
super.onResume();
}
접기
접기
@Override
public void onCreate(Bundle savedInstancestate) {
super.onCreate(savedInstancestate);
setContentView(R.layout.ui_listview2);
System.out.println("Entered onCreate()");
lvMore = (ListView)findViewById(R.id.lv_morelist);
footer = getLayoutInflater().inflate(R.layout.ui_sub_footer, null, false);
/// Spin animation 관련 ImageView 구현
loadFooter = (ImageView)footer.findViewById(R.id.iv_list_footer_loading);
loadFooter.setBackgroundResource(R.anim.anim_spiner);
footerSpinAnim = (AnimationDrawable)loadFooter.getBackground();
header = getLayoutInflater().inflate(R.layout.ui_sub_header, null, false);
/// Spin animation 관련 ImageView 구현
loadHeader = (ImageView)header.findViewById(R.id.iv_list_header_loading);
loadHeader.setBackgroundResource(R.anim.anim_spiner);
headerSpinAnim = (AnimationDrawable)loadHeader.getBackground();
getData();
}
접기
접기
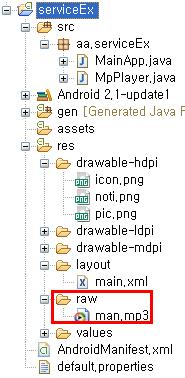
anim_spiner.xml : drawable에 존재하는 image는 Android에서 사용하는 ProgressDialog spin image 혹은 popup sync image를 사용하면 된다.
<?xml version="1.0" encoding="utf-8"?>
<animation-list xmlns:android="http://schemas.android.com/apk/res/android"
android:oneshot="false">
<item android:drawable="@drawable/img_intro_loading_a"
android:duration="150">
</item>
<item android:drawable="@drawable/img_intro_loading_b"
android:duration="150">
</item>
<item android:drawable="@drawable/img_intro_loading_c"
android:duration="150">
</item>
<item android:drawable="@drawable/img_intro_loading_d"
android:duration="150">
</item>
<item android:drawable="@drawable/img_intro_loading_e"
android:duration="150">
</item>
<item android:drawable="@drawable/img_intro_loading_f"
android:duration="150">
</item>
<item android:drawable="@drawable/img_intro_loading_g"
android:duration="150">
</item>
<item android:drawable="@drawable/img_intro_loading_h"
android:duration="150">
</item>
<item android:drawable="@drawable/img_intro_loading_i"
android:duration="150">
</item>
<item android:drawable="@drawable/img_intro_loading_j"
android:duration="150">
</item>
<item android:drawable="@drawable/img_intro_loading_k"
android:duration="150">
</item>
<item android:drawable="@drawable/img_intro_loading_l"
android:duration="150">
</item>
</animation-list>
접기
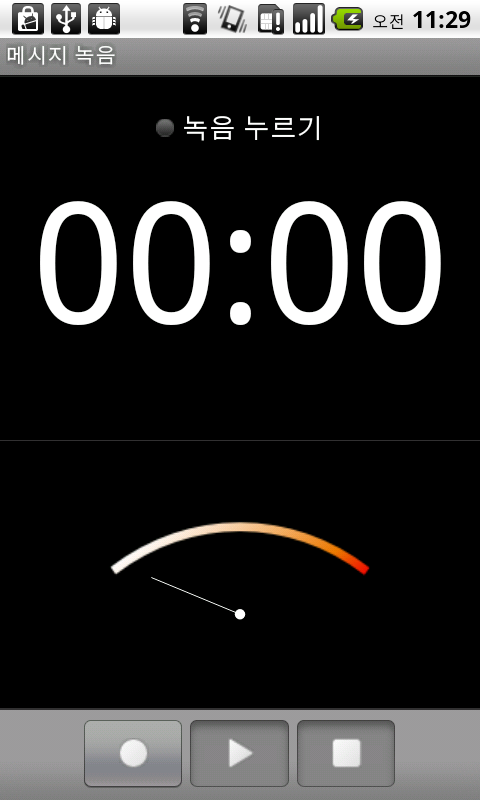
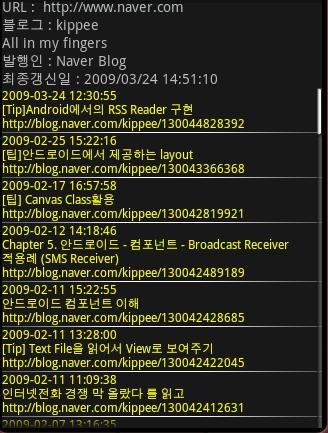
초기 실행 시 화면 |
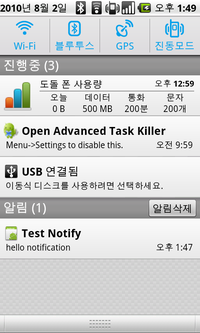
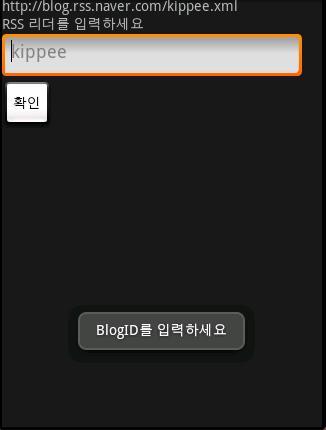
Scroll up 한 후 Touch up 했을 때 화면 |
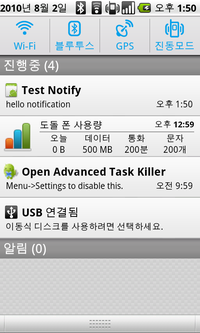
Scroll down 했을 때 화면 |
'Android > Tip&Tech' 카테고리의 다른 글
| AnimationSet 이해2 (0) | 2010.12.13 |
|---|---|
| [펌]Animation에 대한 이해(1) - animaiton( android.view.animation ) Api (0) | 2010.12.13 |
| [펌]안드로이드의 비동기화 방식 참고 예제 (1) | 2010.12.10 |
| [펌]progress dialog 참고예제 (0) | 2010.12.10 |
| [펌]listview에 progress 적용참고 팁 (0) | 2010.12.10 |
 Async.zip


 ServiceAgent.apk