오늘도 공부
안드로이드 팝업윈도우 만들기 본문
출처 : http://blog.naver.com/vortex2s?Redirect=Log&logNo=10102806271
안드로이드를 개발하다보면 Dialog같은 메시지 창을 자주 쓰게 되는데 기본으로 주어지는 것은 AlertDialog와 Toast밖에는....ㅠㅠ AlertDialog는 이쁘지 않고 몬가 불만족스럽고 Toast는 간단한 메시지를 띄워서 보여주기 좋은데..이것도 마찬가지로..ㅠㅠ불만이 많다..
개발을 하다보면 나만의 메시지창을 만들어 보고 싶다는 생각을 하게 되는데 그럴때를 위해 Popup View로 이쁘게 만들면^^나만의 메시지창을 띄울수 있다.
예제 소스와 간단한 주석으로 나만의 Popup View를 만들어 보자.
먼저 PopView를 생성하도록하자.
public class PopView {
protected final View anchor;
protected final PopupWindow window;
private View root;
private Drawable background = null;
protected final WindowManager windowManager;
public PopView(View anchor) {
this.anchor = anchor;
this.window = new PopupWindow(anchor.getContext());
window.setTouchInterceptor(new OnTouchListener() {
@Override
public boolean onTouch(View v, MotionEvent event) {
if (event.getAction() == MotionEvent.ACTION_OUTSIDE) { // popupview영역 외의 바깥부분을 터치할 시
PopView.this.window.dismiss();
return true;
}
return false;
}
});
windowManager = (WindowManager) anchor.getContext().getSystemService(Context.WINDOW_SERVICE);
onCreate();
}
protected void onCreate() {}
protected void onShow() {}
protected void preShow() {
if (root == null) {
throw new IllegalStateException("IllegalStateException preShow.");
}
onShow();
if (background == null) {
window.setBackgroundDrawable(new BitmapDrawable());
} else {
window.setBackgroundDrawable(background);
}
window.setWidth(WindowManager.LayoutParams.WRAP_CONTENT);
window.setHeight(WindowManager.LayoutParams.WRAP_CONTENT);
window.setTouchable(true);
window.setFocusable(true);
window.setOutsideTouchable(true);
window.setContentView(root);
}
public void setBackgroundDrawable(Drawable background) {
this.background = background;
}
public void setContentView(View root) {
this.root = root;
window.setContentView(root);
}
public void setContentView(int layoutResID) {
LayoutInflater inflator = (LayoutInflater) anchor.getContext().getSystemService(Context.LAYOUT_INFLATER_SERVICE);
setContentView(inflator.inflate(layoutResID, null));
}
public void setOnDismissListener(PopupWindow.OnDismissListener listener) {
window.setOnDismissListener(listener);
}
public void dismiss() {
window.dismiss(); // popupview를 닫는다.
}
}
생성된 popupview를 상속받아서 동작할 class를 만든다.
public class Pop extends PopView{
private final Context context;
private final LayoutInflater inflater;
private final View root;
private ViewGroup mTrack;
public Pop(View anchor) {
super(anchor);
context = anchor.getContext();
inflater = (LayoutInflater) context.getSystemService(Context.LAYOUT_INFLATER_SERVICE);
root = (ViewGroup) inflater.inflate(R.layout.popview, null);
setContentView(root);
mTrack = (ViewGroup) root.findViewById(R.id.viewRow); //팝업 View의 내용을 추가한 LinearLayout
}
public void show () {
preShow(); //상속받은 PopView의 메서드
int[] location = new int[2];
anchor.getLocationOnScreen(location);
root.setLayoutParams(new LayoutParams(LayoutParams.WRAP_CONTENT, LayoutParams.WRAP_CONTENT));
root.measure(LayoutParams.WRAP_CONTENT, LayoutParams.WRAP_CONTENT);
window.showAtLocation(this.anchor, Gravity.CENTER, 0, 0); //가운데 정렬 하여 보임
}
}
이제 이렇게 되면 popview의 준비는 끝이네요~^^ 이제 xml의 구성을 보면 되겠죠.
먼저 popview가 되어질 xml입니다. 팝업되는 화면이죠.
<LinearLayout xmlns:android="http://schemas.android.com/apk/res/android"
android:layout_width="wrap_content" android:layout_height="wrap_content">
<ScrollView //임의적으로 view를 뿌려주기위해 가로 세로 200dip의 크기 efefef배경색으로 지정
android:layout_width="200dip" android:layout_height="200dip"
android:fadingEdgeLength="0dip" android:background="#ffefefef"
android:scrollbars="none">
<LinearLayout android:id="@+id/viewRow"
android:layout_width="wrap_content" android:layout_height="wrap_content"
android:paddingTop="2dip" android:paddingBottom="2dip"
android:paddingLeft="10dip" android:paddingRight="10dip"
android:orientation="vertical" />
</ScrollView>
</LinearLayout>
이제 popview의 준비는 끝났고, 이벤트를 통해서 popview를 띄우도록 하겠습니다.
간단하게 버튼하나를 추가하고버튼을 클릭했을때의 이벤트를 받도록합니다.
@Override
public void onClick(View v) {
Show(v);
}
Pop pop;
private void Show(View v){
pop = new Pop(v);
pop.show(); //popview를 출력
}
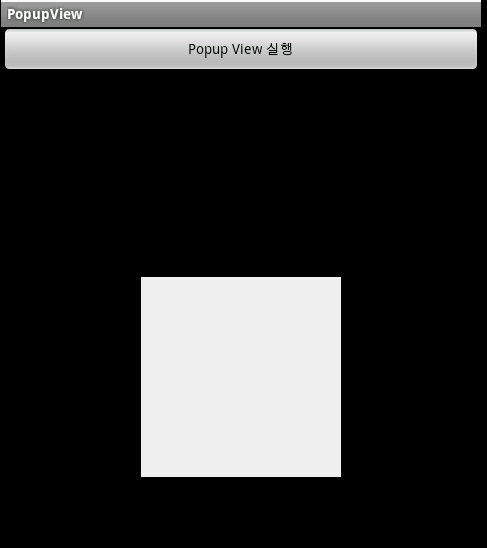
이렇게 간단하게 view를 출력하면 간단한 팝업창이 나오게됩니다. 그냥 회색의 네모로 보이지만 xml로 이미지를 넣고 꾸미면 더 좋은 popview가 완성 됩니다.

다음번에는 이벤트와 텍스트등을 더 넣어 보겠습니다.
팝업 뷰 만들기 - 2 텍스트, 이벤트, 이미지 추가하는 방법입니다.
'Android > Tip&Tech' 카테고리의 다른 글
| 모든 뷰에 이벤트 등록하기 (0) | 2011.06.29 |
|---|---|
| 안드로이드 및 아이폰 해상도 비교 (0) | 2011.06.29 |
| android editext textarea처럼 만들기 (0) | 2011.06.28 |
| android 퍼미션 종류별 정리 (2) | 2011.06.24 |
| 루팅폰 확인하기 (0) | 2011.06.23 |

